Raiding the larder of ideas.

What one family eats, plans to eat, dreams of eating. Plus, other food and kitchen-related stuff from the home of steak-and-potatoes, pie and fresh green beans from the garden.
Showing posts with label holiday treats. Show all posts

Wednesday, December 30, 2015

Cinnamon Christmas Stars, aka Zimtsterne

This is one of those recipes which is not outrageously expensive, and yet is outrageously tasty and outrageously easy to make – the latter especially so, if you have a young'un or two around the house who happen to be willing to help out with the cutting and slathering with icing. But even without my having assistance of Ilex, 


this Christmas treat is one I'll be making regularly…possibly even outside the holiday season. It's that good. Plus, it's gluten-free by its original design, so there is that, as well. I don't have to worry about remembering to adapt my freezer-full of flours to meet the current needs.

I do recommend bringing out your most accurate kitchen scales before you get started, too. Not only is it what the original recipe called for, but I find that – as professional bakers have assured me – dry ingredients may vary wildly in their density from one milling to the next, so one cup of something one day may be 10% heavier than the next day, so you'll have less predictable results.

However, I will need to study further, to see if they can be made with alternative sweeteners, for my other friends who are on low- or no-sugar-added diets. But, as a certain non-German woman once said, "I'll think about that tomorrow." I'll finish eating giving away these, first.

Heh.

Meanwhile, here's what we have: starting with this recipe, and adapting slightly to our kitchen. 

Zimtsterne (Cinnamon Stars)

Ingredients:
3 egg whites
250 grams powdered sugar
360 grams finely ground almonds or almond flour (I used non-blanched for this batch)
2 1/2 tsp cinnamon
Fresh, finely-grated zest of 2 small lemons (about 2 Tablespoons)
Pinch of salt

Directions:
Make sure your mixer bowl and whisk attachment are completely clean and free from any oils before you start. (I recommend washing, drying, and then taking a paper towel or cloth moistened with cider vinegar to wipe it clean again, to be doubly sure.)

In that bowl of your stand mixer, using the whisk attachment, beat egg whites until they become foamy.

Begin adding the powdered sugar in small batches (a few tablespoons at a time) while the mixer is running. Beat on high until the meringue is very shiny, but before very stiff peaks form. This may take ten minutes or more, so be patient.

Remove 50 g of the meringue (about 1/3 – 1/2 cup) to a small bowl, cover and refrigerate.

Next, in a medium bowl, whisk together the ground almonds (or almond flour), cinnamon, lemon zest and salt. 

Fold dry ingredients into the remaining meringue mixture until just evenly distributed, and no more. (If it feels really thick and dense, don't worry. This recipe bakes up light, almost airy cookies, despite its feeling like you're stirring nearly-hardened concrete.)

Tip the contents out onto a large sheet of parchment paper sprinkled with powdered sugar. Sprinkle the top of the mixture with some more powdered sugar and top with another sheet of parchment paper. Roll out the dough to just under 1 centimeter thick. Refrigerate 1/2 hour to an 1 hour, to help firm up dough and reduce its stickiness.

Once sufficiently chilled, remove from refrigerator, peel off the top sheet of parchment and sprinkle again with a bit of powdered sugar.  Coat your star cookie cutter with nonstick spray and wipe excess away. Then, dipping your cutter into powdered sugar each time, cut out the stars and place fairly close together on a parchment-covered cookie sheet (they don't expand very much). Continue to collect the dough into a bowl and roll out until all is used up.

Preheat the oven to 300° F., or 150º C.

Using an offset spatula or a knife (I use a tapered icing spatula, for more precise application on the star points)  spread the remaining meringue mixture evenly across all stars, making sure it doesn’t drip down the sides. Place in oven and bake for 8-10 minutes. Keep an eye on them --  you don't want the meringue to brown, just cook and crisp up a little.
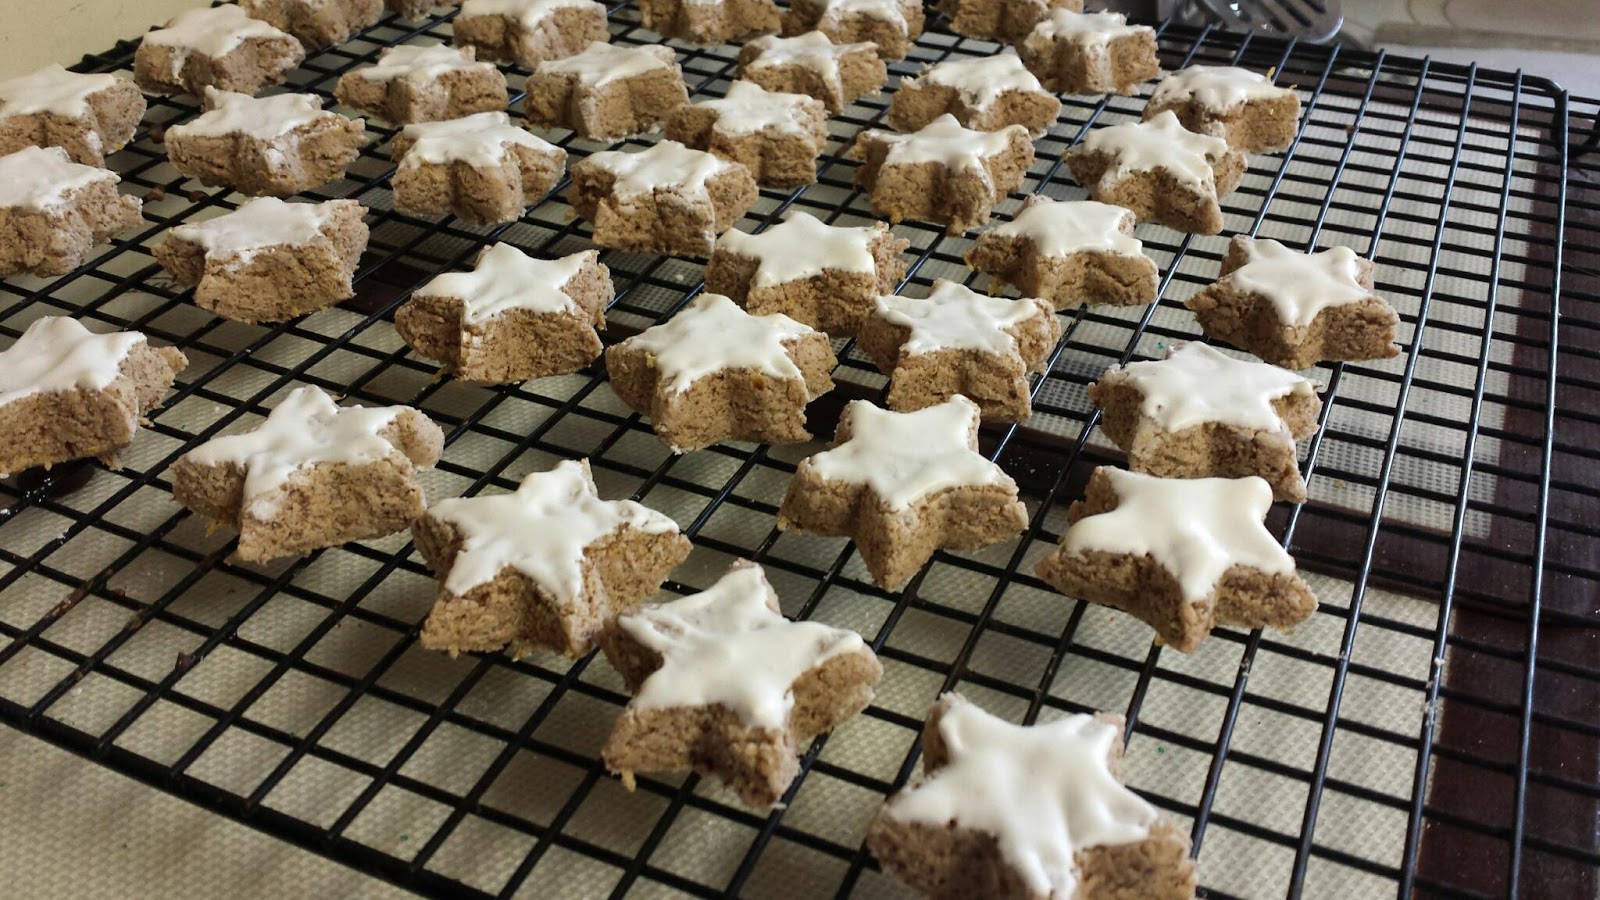
Let cool on the cookie sheet for 5 minutes and then transfer to a cooling rack. Allow to completely cool. Store in an airtight container for up to a few weeks.

Makes about 50-75 6cm (roughly 2 inch) 2-bite stars. Larger cookie cutters will, obviously, make fewer cookies, and be slightly less challenging to get unstuck from the pointy parts of the cutter. 


Update: I've given a try to substituting an artificial sweetener for another batch (1 cup Splenda instead of the sugar). The flavor is as good, and the cookies are as tender as the regular ones (if a wee tad drier on the tongue), but it seems that the Splenda-based meringue topping, when left to sit in the refrigerator for a while, tends to curdle. This may mean I over-beat the eggs (easy enough to do when you're whipping eggs without sugar), but I think I'd like to give a try to separating out one egg white in advance – or measure out prepackaged egg white – and whipping that up with sweetener, only after I've allowed the dough to chill, and I'm ready to cut the stars.
They're not as pretty as the real sugar version, but I'll have no qualms about noshing on them, or sharing with others…if I have to.

Wednesday, December 25, 2013

Candied Cranberries

Sometimes, at the end of Thanksgiving, I still have a spare bag of cranberries, as well as about half the sauce I made for that dinner. I've learned to serve the sauce, thinned and combined with a handful of other ingredients, as a salad dressing, or slathered on biscuits and pancakes,  and countless other ways to keep it from going to waste. The fresh cranberries, themselves, could probably be frozen, but this time of year, the freezer is usually pretty full, so I'd rather not try to cram more in.

Therefore, I seek out alternatives.

If you have a cup or two of leftover cranberries from Thanksgiving (or just want to do something lovely  with what you have, regardless of whether they're leftovers or not), you can candy them up a bit, and have a nice treat with the sweetness and the tartness playing back and forth across your tongue. 

It's not something to have ready in an hour – it takes overnight and a little change. 

But it's well worth it.

Candied Cranberries

Ingredients:

1 cup water
1 cup sugar
1 cup fresh cranberries, washed, sorted (no bruised or shriveled ones), and allowed to dry
1/2 cup extra-fine granulated sugar

Directions: 

In a small saucepan over medium heat, dissolve sugar in water. Bring just barely to simmer – do not boil! (If it does boil, you'll have to wait for it to cool a few minutes before the next step).

In a small container, combine cranberries and sugar-water. Place in refrigerator and allow to chill at least 8 hours or overnight. 

After they have cooled over time, pour cranberries and syrup into strainer  over bowl. You may wish to save the syrup for some other recipes (it's a nice simple syrup with a faint hint of the berry flavor, good in some drinks). 

Meanwhile, lay a sheet of parchment in a large jelly roll pan (sided cookie sheet) and put extra-fine sugar in a bowl. A few at a time, roll the cranberries  in the extra-fine sugar, then allow to rest and dry out for at least 1 hour on the parchment.

Nibble on them straight as a snack, or use them to decorate desserts, like a buche de noël.


Thursday, April 21, 2011

Bunnies, bunnies, bunnies...

Today, I'm breeding bunnies.

The process is very simple -- almost as simple as the mother nature variety (but not nearly so overwhelming, for the uninitiated). In fact, if you go back to my Christmastime post on Mice in the Kitchen, you already have the basics.

You will need a double-boiler and either waxed paper or parchment for this project, as before. But, sorry, no dark chocolate. I also recommend avoiding the use of white chocolate chips, favoring the brick/block style chocolate for this project, because I find that the chips tend to be less inclined to melt smoothly (they're great baked into stuff, but crummy for dipping). And, by my personal preference, I have chosen the white chocolate kisses with cookie crumbs in them, over plain white chocolate or the hugs, with the chocolate stripes. It's mostly esthetic, but then, I also like how the cookie bits cut the excessive sweetness of white chocolate, and these little guys are plenty sweet anyway. I also chose to visit the organic food store for their unsweetened, medium coconut, rather than the other local supermarket brand option, for the same reason (they only carry sugar-added). Sweetened coconut would just be too darned much, for anybody over the age of six.

So, to bunnies.

White Chocolate Marshmallow Bunnies

Ingredients:

1 lb white chocolate (block form)
1 bag regular "campfire style" marshmallows
1 bag mini marshmallows
1 bag (12 oz or so) Hershey's white chocolate kisses, your choice of variety
1/2 cup unsweetened coconut, medium or fine flake
sliced almonds or cashew halves

Directions:

In the upper portion of a double boiler, over low heat*, melt white chocolate. Dip large marshmallows, one at a time, to completely cover them with the white chocolate, set them on parchment or waxed paper to cool a little bit.

While those are cooling, lay out pairs of nuts on another parchment sheet, to form ears (use your own artistic sense to decide whether to point them all in one direction, or to make the "lop ear" arrangement). If you are using almond slices, set them up so the pointier side is left fully exposed, and the round end is the anchor. Dip flat side of kiss into white chocolate (or, dip a tool into it, then spread onto the flat surface), then set that, liquid-side-down, on top of a pair of nuts. Allow to cool a few minutes, to set up. You do not want to try to attach them to the "body" too soon, as they will tend to surrender to gravity if the chocolate is still too soft.

Meanwhile, dip small marshmallow into chocolate. Roll in coconut, let rest on one edge of cooling dipped marshmallow to make the tail.

Add the head (if they've cooled too much for the chocolate to adhere, go ahead and lightly dip again, hold in position for a little while before moving to the next bunny).

Do not allow any two to sit too closely together... bunnies can become a problem, can't they?

1 lb of white chocolate will make approximately 4 dozen bunnies, depending on how thick you layer the chocolate on the marshmallows.


*be careful to keep the temp down, and to stir regularly. White chocolate will quickly turn to lumpy, beige, vanilla-flavored almond bark if allowed to overheat. It tastes okay, but if you wanted pristine white bunnies, you won't get them if you're not on your toes. I speak from experience.


Note: If you don't like the long noses these bunnies have, wait until they're cooled, then heat a knife to melt/cut off a portion, to round the face out a little. I find that the kids who eat these little guys have no complaints about my Cyrano de Bungeracs.