Raiding the larder of ideas.

What one family eats, plans to eat, dreams of eating. Plus, other food and kitchen-related stuff from the home of steak-and-potatoes, pie and fresh green beans from the garden.

Friday, December 23, 2022

Bright and Zingy Succotash

 Let's be honest. Succotash is often what you make when you don't have enough of any one particular veggie, so you toss together what you have, with a some lima beans and corn. Some people fill it out Southern style, with a mess of okra. I actually like throwing in a little winter squash, from time to time. But tonight's version… well, Pop asked for seconds, so that's a victory not to be taken lightly.

And the fact that it's so simple to prepare makes it that much better. 


Red, green, golden, and spicy


Bright and Zingy Succotash

Ingredients:

2 cups frozen baby Lima beans
1 tablespoon butter
1/2 small onion (about 1/2 cup), diced
2 cups frozen sweet corn
1 can (14–16 ounce) diced fire-roasted tomatoes drained, liquids reserved
1/2 teaspoon cayenne pepper
1/2 teaspoon salt

Directions:

Preheat oven to 300ºF. 

In a steamer or microwave, cook baby Lima beans until almost tender.

Using a 12-inch oven-safe frying pan, sauté diced onion in butter until transparent and tender. Add in corn, cooking on low heat until some kernels begin to brown. Stir in drained tomatoes, cayenne pepper, and salt, then add cooked Lima beans. Stir well. Place on rack in oven, roasting for 10 minutes.

Remove from oven, add in the reserved tomato juice and stir well. Serves an army (well, 8-10 very hungry people, at any rate).


FTR, I can't tell whether it was the tomato or the cayenne zing which won Pop over, and, frankly I don't care. I'm just glad he liked it.

Christmas Comfort Cabbage Gratin

Holidays can sometimes be tough for people on various dietary restrictions – all the cookies, candies, and, of course, in our house, the bûche de noël, a chocolate- and Cointreau-laden (and yet still gluten-free) scroll of decadence.

Amid all that misbehaving, some people need a little basic comfort food, but with a little extra something. This is where, at my table this year, a head of cabbage takes on a faint hint of holiday decadence, with cider syrup, rich cream and a couple of my favorite types of cheese.


there'll be a bit of a fight over these leftovers…


Christmas Comfort Cabbage Gratin


Ingredients:

1 large head green cabbage (about 2 lbs)
2-3 Tablespoons vegetable oil, plus more to grease dish
light sprinkling of kosher salt

zest of 1 small lemon (about 2 teaspoons)
1/2 cup Parmesan cheese, freshly grated
2/3 cup freshly grated smoked Gruyère cheese
1/2 cup panko breadcrumbs* (I use gluten-free)

1/4 cup lemon juice
1 teaspoon kosher salt

2 Tablespoons apple cider syrup†
1 teaspoon garlic, grated or minced
1 1/2 Tablespoons thyme
1/2 teaspoon white pepper, finely ground
1 teaspoon Worcestershire sauce
2 cups heavy or whipping cream

Directions:

Preheat oven to 400º F

Strip away outer leaves from cabbage head, cut cabbage into 8 wedges, leaving the core attached. Arrange neatly in greased baking dish (if you're using a round dish or oven-safe frying pan, setting them in a pinwheel pattern is attractive, but go ahead and see what design you like). Brush with oil to completely coat, then sprinkle lightly with salt. Roast until the leaves are lightly charred and the cores have become tender (about 10 minutes).

While the cabbage is roasting, combine the lemon zest, cheeses, and bread crumbs in a medium-small mixing bowl, and set aside.

In another medium-small mixing bowl, combine apple cider syrup, garlic, thyme, pepper, Worcestershire sauce, and, after stirring well, gradually add heavy cream, stirring rapidly.

When the cabbage leaves have browned well on the edges and/or tops, reduce oven temperature to 375º F., sprinkle with lemon juice and a teaspoon more salt, and pour cream mixture evenly over roasted cabbage. Top with cheesy breadcrumb mix, and bake for 20–25 minutes. Allow to cool about 5 minutes before serving.

*If you're trying to reduce your carb count, almond meal may be used as a substitute, but I recommend toasting it a bit, well in advance of adding it to the cheeses.

†If you don't have this in your cupboard, you can simmer a cup or more of cider until it's reduced to about 1/4 cup (it can take a half hour or so. If you make a larger batch, freeze it in small cubes & it'll last for years). Or you can substitute a relatively dry wine.


It ain't a fancy dish, but it's pretty enough to pass around the holiday table, and easy enough to make it your own.

Sunday, October 09, 2022

Creamy, Dreamy, Broccol-y Soup

 I bought some fresh veggies for crudites, last weekend, and then realized there was already a superabundance of food, so the broccoli, in particular, sat in the refrigerator crisper, calling out recriminations for its neglect, until… 

 SOUP WEATHER ARRIVED!

 FTR, this is a quick, easy, but definitely not low-fat option.


Broccoli Cream Soup

Ingredients:

1 small onion, minced (about 1/2 cup)
1 Tablespoon butter
2 or 3 fresh leaves, finely chopped (or 1/2 tsp dried) basil
pinch dried rubbed sage
pinch dried crushed thyme

2 cups chicken broth plus 1/2 teaspoon powdered chicken bouillon* 
1 bay leaf
4 cups fresh bite-sized broccoli florets

1/4 cup buttermilk
1 cup whole milk
1/2 cup whipping cream
8 oz cream cheese, cut into 1/4 inch slabs  (or smaller) and brought to room temperature

ground white pepper to taste

Directions:

Melt butter over medium heat in a small frying pan. Add onions, cook until transparent. Stir in herbs and set aside.

In a 3-quart (or larger) saucepan, bring chicken broth, bouillon powder, and bay leaf to a boil. Add in broccoli, allow to return to low boil, then reduce to low heat.

Remove bay leaf. Stir in onion/herb mixture.

In small mixing bowl, soften cream cheese (I often give it 20 seconds in the microwave).

Heat milk and buttermilk (saucepan or microwave – your choice) until just simmered, but do not boil. Pour about 1/2 cup of this into the cream cheese, and whisk until smooth. Add remaining milk mixture, continue to stir. Pour this mixture into the saucepan, add the cream, and stir until completely mixed.

Allow to return to low simmer, remove from heat, and serve.


*I'm notorious around here for using this stuff in many of my recipes, including dips and sauces. I can get away with using less salt & still get full flavor. If you prefer fewer additives, substitute salt & pepper to taste– or you don't want the extra sodium, Herb-Ox makes a very nice alternative. It isn't a "must add" item, but it gives a nice balance.


Cod Pieces (because I HAD to go there)

Sometimes I wish I weren't allergic to crustaceans. There are days when I crave crab cakes the way some people crave chocolate doughnuts, but the prospect of anaphylaxis puts a damper on my desires.

This  is not to say I can't eat fish in general – in moderation. With that in mind, I occasionally do my best to cheat the system. I hunt down a simple enough crab cake recipe, and substitute a tender, sweet fish.

This week, I found Cod.

I found it in the freezer at ALDI. I also found I have a superabundance of Old Bay seasoning blend, big scallions growing in a flower pot in the laundry room, some eggs, a mess of almond flour, several jars of Duke's mayonnaise, and a half-pound chunk of Parmesan cheese. Add to that, there are, perhaps, a dozen different recipes for fish cakes and crab cakes in my files (hard copy and digital), none of which was exactly what I was looking for (especially as calls for breading and other fillers), leading me to make stuff up as I went along. Sort of.

To be fair, I've done variations on this theme before, but usually with canned fish of one sort or another, and a mess of lemon juice (and no cheeses). I like it better when there's fresh fish or fresh-frozen fish factored in, for F's sake.


So, let us eat cakes.


Cod Cakes (Big Cod Pieces!)

Ingredients:

1 1/2 cups freshly grated Parmesan cheese, divided
1 1/2 cups blanched almond flour
2 lbs cod filets, baked or steamed, allowed to cool
2 large eggs
1/3 cup mayonnaise
3/4 cup finely chopped scallion greens
2 teaspoons Old Bay seasoning blend


Directions:

Preheat oven to 375º F.

Prepare a large well-greased non-stick baking sheet.

In a small bowl, mix together 1 cup Parmesan cheese and all the almond flour. Separate 1 cup to stir into fish mixture, and put the remaining portion of this in a shallow dish.

Break apart cod filets into large chunks.

In a medium bowl, lightly mix together eggs, mayonnaise, scallions, and Old Bay seasoning.

Add in 1 cup of almond flour/Parm mix and all the fish chunks, and gently stir, breaking up larger chunks of fish – be careful to avoid over-mixing (I do this by hand. You get a better sense of how large the chunks will be, and it's also surprisingly therapeutic).

Divide mixture into 12 equal portions, forming each into a ball. Roll in reserved almond flour/Parm mix, place on well-oiled baking sheet, and gently press into flat patties about 1 inch thick.

Sprinkle reserved 1/2 cup grated cheese over top of patties.

Bake 15 minutes, or until top is golden-brown.

Allow to stand & cool about 3-5 minutes before serving.


These can be fried in butter (or a small amount of oil), as well, but that's a more labor-intensive operation, fraught with risk that the cakes will fall apart before you can get them to the plate. Also, there's all that extra grease…

Saturday, September 03, 2022

Preparedness: Not Just for Boy Scouts

I've posted the pages for this little cookbook
in previous posts, but it's also at my Flickr pages

"A new bride [in my social circle] has asked me for cooking lessons. What's one essential kitchen thing you wish you'd known how to do earlier in your life?"


Someone posed this question recently, & I gave it a quick response, but after mulling it over, I've come to the conclusion that my reply needs to be expanded.

Grandma Helen had – and Mom still has – what I call the three "P"s: Planning, Preparation, and Pacing oneself. The first two are always important in getting dishes on the table, but the last one is always the most challenging, and, unsurprisingly, often the most neglected skill in the kitchen. The goal, here, is to be able to serve a meal for yourself and your loved one(s) without coming to the table so frazzled you make your dinner companion(s) uncomfortable.

Of course, if you're an absolute rookie cookie, your ability to do any pacing is limited, because you won't know what it takes to get anything together and on the table. It helps, therefore, to start very simply. Don't plan fancy dinners for dozens of guests, with monster menus. New brides, you're cooking for yourself and one other. Don't be afraid of shortcuts like mixes and kits – they are the training wheels and/or comfortable shoes (Crocs?) of kitchen wizardry.


When you have an hour or two, sit down and begin to read through a basic cookbook – my high school graduation gift of The Joy of Cooking was where I started, but I can also recommend How to Cook Everything (and/or its follow-up, HTCE The Basics), or ask at your local library or book store if they've got any interesting introductory cookbooks you can peruse.* And seriously, I mean read it. You'll get a general sense of how long most recipes take to prepare and cook.

Side note: I don't generally recommend trying to follow internet recipes when you're too new to the game, although I'll make exceptions for those which use test kitchens, and define and explain both the process and the results. Videos offering instruction on techniques can be helpful, but, again, one needs to have enough experience to know that some suggestions are just plain bad ideas. Stick with the well-known professional cooks' and culinary sites, initially, if, for example, you need to see someone demonstrate how to sharpen a knife and dice an onion safely (both things a good cook needs to know fairly early).

In younger days, the Candy Man
He's now the master of the potato masher

Okay, now that you've done a little research, the next stage is to begin playing with your supplies. I mean playing, too. You're a sculptor and a chemist and a bit of a mad scientist. You know in theory what can happen on that stove top or in that oven, but what about what your mixer does? And how long does that mixer take to do what it does? Why does that recipe say "in a non-reactive pan"? What the ever-lovin' heck does that even mean? Well, fool around and find out! Get out ALL the tools and ingredients your recipe says you're going to need, set them out on the counter or table in the order they were listed. Go ahead and say "hello", if you wish. My personal preference is to measure all the ingredients in advance, the way they do on cooking shows, using, among other things, small mason jars (if disaster strikes & I'm delayed – which does happen – I can pop a lid on the cold items, stack 'em in the fridge, & come back to safe, unspoiled and unspilled-by-cats ingredients). Then make a mess. Taste that mess. Clean up and do it again tomorrow, with a different list of ingredients.

After you've gained a little experience playing the game, you can start planning ahead. The recipe for muffins says prep time is 5-10 minutes and the baking time 20-22? Yeh, that's not gonna do it. Give yourself enough time to rifle through the fridge & bring eggs, butter, and/or other such basics to room temperature if needed, and to preheat the oven. And, of course, enough time in case – like me – you discover that you're easily distracted. In other words, allow yourself extra time for things to go wrong, because, in early days, things will go wrong (sometimes horribly. Like I used 3 Tablespoons of salt instead of sugar so the trash can gets the entire batch and I start anew wrong). And, then, while the muffins are baking, wash up those dishes you used (or, in my case, clean up the floor and counter where I spilled half my ingredients, set out the cooling rack, and then wash what dishes I can in the remaining time…). Your first batch, you should scientifically test for yourself as soon as it's cool enough to pop in your mouth. (After you gain confidence in your culinary skills, you should probably diplomatically offer the first bite to your nearest and dearest.) Then get that tasty treat onto the table, sit, and enjoy each other's company over a bite to eat.

All this is pacing for a single thing. Once you know how long it takes to make one dish, do some more research, and try two dishes (e.g., a skillet steak and baked potatoes, with a salad kit for color), and then doing all the steps for a full meal, when you've got the hang of simpler multi-tasking. And this is where you learn your own strength and endurance. And where you learn to use your own shortcuts and tricks, like prepping many dishes days ahead – or even weeks, if your freezer has room. And where you learn to occasionally, politely, ask for an extra hand in something (Mom used to ask Pop for heavy lifting & for retrieving things from top shelves, but when I got tall & strong enough, she allowed Pop his freedom).  Over time, you'll be prepping a full holiday feast for extended family, seating, serving, & enjoying the company of a dozen or more guests, if that's your desire.

And, quite frankly, it's one activity I finally, truly, enjoy, now that I've figured out how to pace myself.


Of course, these days, I also get other family members to pitch in, potluck style. But that doesn't mean I don't have to have a rough schedule for the things I need to bring to the table.


*If you're a bit nerdy, as I am, you may also like chewing on the kitchen chemistry info in Culinary Reactions. I am also assured by a longtime friend that The Science of Cooking is nerdy, practical and attractive.

Wednesday, August 10, 2022

Wee Bee Jammin' with Peaches


Hello, Peaches!

We bought a few bushels of Georgia peaches at a truck sale, and, after eating our fill of those fresh treats, we still had a dozen or so left over, and nobody wanted to let them go to waste. Some went into the freezer, some into the dehydrator, and the rest became jelly-jammy preserves.

And I ordered a batch of labels to go with them (and whatever other preserving projects I have coming up in the next season).
 

my new label

Also, I managed to make the jelly-jammy-preserves with no sugar or artificial sweeteners added. So, decadence comes with a low degree of guilt, and only three ingredients: fresh peaches, frozen apple juice concentrate, and pectin for sugar-free recipes (I used Sure-Jell in the pink box).

That kind of victory is worth sharing.

If you want to try this at your house, you're going to want to get all your stuff together in advance, because, once you start cooking, you won't have the time.

You'll need:

1 3-quart (or larger) nonreactive (non-aluminum) saucepan
1 smaller saucepan
1 wooden spoon or heat-resistant silicone stirring spatula
5 half-pint mason jars with lids and rings
1 pair of tongs
1 ladle
1 canning funnel
1 small bowl
1 regular metal spoon (any metal table spoon or soup spoon will do)
clean dampened cloth or paper towel
1 canning kettle (with rack), filled with enough warm (not hot!) water to cover your jars with an inch over their tops

You will also need to make certain you have a cleared work space immediately next to your stove top. I usually put all my gear in a paper-towel-lined jelly roll pan (cookie sheet with sides), to minimize the mess I'll have to clean up afterward.

And you really do want to do a hot bath or pressure bath with these, even more than with regular, sugary jams, just to be on the safe side. If any jars aren't completely sealed by the end of the process, you'll want to immediately refrigerate them, & eat the jam up within a few weeks. Properly bath-sealed, they can last on the shelf for up to a year.


 Simple Peach Jam/Preserves

Ingredients:

3 cups fresh peaches, peeled and cut into small pieces (or coarsely mashed)
1 can (12 oz.) frozen apple juice concentrate, thawed
1 package sugar-free pectin

Directions:

Clean and sterilize 5 half-pint jars (if you have a dishwasher, run the sterilizing cycle shortly before you're ready to start cooking, and allow the jars to remain hot in it until you're ready to use them. If your kitchen is not equipped with this appliance, cover your washed and rinsed jars with water in a pot on the stove, bring to a boil, and then leave at low simmer until you're ready to use them).

In small saucepan (2 –3 cups), cover jar lids with water, bring to a low simmer (do not boil!).

In a 3-quart (or larger) saucepan, stir together peach pieces and apple juice concentrate. Sprinkle pectin on top, allow it to begin absorbing moisture, then stir in completely.

Turn heat on to medium-high, and stir constantly until the mixture comes to a full rolling boil (it should continue to boil even while you stir it).

Allow to boil for precisely one minute. (During this time, I fish the jars out of their hot space, and set them beside the stove).

Remove from heat. With regular metal spoon, skim any foam off the top, and set that aside in small bowl.*

Using the funnel, ladle jam into the jars, leaving at least 1/2 inch head space in the jars. Wipe rims of jars with damp cloth or dampened paper towel, to remove any residue.

Using tongs, remove lids, one at a time, from hot water, and fit onto jars. Secure the lids with their rings, finger-tight (you're not trying to make it difficult for the next guy to twist the ring off. Just bring it to the point where it shows real resistance).

Place jars in canning bath. On high heat, bring to full boil, continue to boil steadily for 10 minutes.

Remove jars, allow them to cool on a rack or towel.


*The foam that you skimmed off the top makes a great treat for kids. I have many a fond memory of being handed a frothy jam sample smeared on a saltine cracker.

Note: the fruit usually rises to the top, during the process. Once the jam is cooled to room temperature, you may wish to give each jar a gentle tumble to distribute the fruit evenly amid the jelly (pretend they're fragile snow globes – don't shake & get 'em bubbly, but just give them a little rotation of the wrist until they're mixed to your liking). In the case of my last batch, I had to do this twice (once after the photo session) before the jelly was set sufficiently to hold those bits in place.

Also, the Sure-Jell instructions suggest adding Splenda, for people who prefer their peach jam to have more sweetener in it. IMHO, the concentrated apple juice is enough. If you're the kind of person who adds sugar (or its lab-built substitutes – or for that matter, even honey) to perfectly good, sweet, ripe Georgia peaches, I don't think I want to know you. 

Saturday, August 06, 2022

Cauliflower and the Slaw of Intended Consequences

Some years ago, I was introduced to this side dish at an auction house's concession stand, to go alongside their Untidy Josephs 😉. The original chef grated the cauliflower by hand to a fine "rice" (in this day and age, I suppose you can even find a fresh, bagged version in the same section as the shopped cabbage slaw mix), but I prefer to use the Kitchen Aid slicer, for a prettier, more varied texture.

Any way you work it, though, it's a fairly simple and adaptive slaw.


Simple, Zesty Cauliflower Slaw

Ingredients:
4 cups cauliflower, grated or shredded
1/2 cup mayonnaise
1/4 teaspoon Tabasco sauce (or to taste)
Hot paprika for garnish

Directions:
In a small bowl, stir together mayonnaise and hot sauce.
Stir into cauliflower, mix thoroughly.
Garnish with a sprinkle of paprika.
Serve chilled.

Makes 6-8 servings


This slaw suits nicely any cookout meals, in case you need ideas for the hot summer weekends. Bonus: it's low-carb, low-guilt. 

Enjoy!

Monday, June 13, 2022

Eggplant Gratin for when you want to pretend it's cheating

Sometimes, a girl can get a craving for good old fashioned starchy scalloped potatoes, but those carbs are on the serious no-no list at least for another year, and cheats are still reserved for very special occasions. 

I had some baseline alternate ingredients on hand, though, & put together an experiment in substitutions, this afternoon. 

There is a very good chance I will serve it often, in the future (or, if not serve it, I will certainly prepare it just for myself). The original source for the idea came from one of the many hundreds of KETO/PALEO/MIRACLE-DIET kinds of websites, but since I made a lot of substitutions, I don't really want to link the poor soul who inspired me, for fear that others might want to blame him or her for my kitchen heresies. This is still actually – while not 100% keto – fairly low-carb, as well as gluten-free. It's not, however, particularly low-sodium, and definitely not low-fat. It's tasty as heck, though.


[Pictures will come, I hope, next time I prepare it. But if you've made scalloped potatoes, it kind of looks a bit like that, as it comes out of the oven.]


If you want to try to copy my experiment, here's what I have for you:

Eggplant Gratin

Ingredients:
2 medium eggplants, peeled and sliced about 1 cm thick
plenty of salt
1 1/2 cup V-8 original juice, simmered until cooked down to 1/2 cup (or use 1/2 cup of your favorite thick tomato sauce)
1/2 cup sour cream
1/2 cup whipping cream or heavy cream
3-4 ounces Emporium Selection Feta cheese with herbs (from ALDI store) (possible substitutions include Sundried tomato basil goat cheese or other strong, sharp, crumbly cheeses, with Italian seasonings and sun-dried tomato bits added)
2 Tablespoons chopped chives
5 large fresh basil leaves, cut or torn into small pieces
6 ounces Manchego cheese, finely grated

Directions:

Preheat oven to 350º F. On paper towels, lay out eggplant slices. Heavily salt both sides, cover with paper towel, and allow to stand about 10 minutes, or until the towel is soaked through. Using fresh paper towels, press out more liquid (this will remove most of the bitterness your eggplant may have, and will help keep the gratin from becoming too soupy).

Lay eggplant slices on cookie sheets lined with baking parchment, bake about 10 minutes, flip slices over, and bake another 8-10 minutes, until eggplant is quite soft.

Meanwhile, in microwave-safe dish, combine sour cream, heavy cream, feta cheese, and chives. cook on high for 3 minutes, stir, and cook another 2-3 minutes, until it comes to a full boil. Remove from microwave oven, stir well until feta cheese is mostly melted into the sauce, and set aside this white sauce for the moment.

Spoon or brush 1/3 of your tomato sauce (the V-8 reduction, if you have it) across the bottom of a 2.5 quart casserole or deep gratin dish. Place the slices from one eggplant in a single layer to cover the bottom of dish (somewhat overlapping is encouraged) apply another 1/3 of the V-8 reduction over the surface of the eggplant, spread 1/4 of the grated Manchego cheese over that, and sprinkle the top with 1/2 of the fresh basil shreds. Place another layer of eggplant slices over this, spread the top with the remaining V-8 reduction, 1/4 of the Manchego cheese, and the remaining basil. (this is the "Lather, Rinse, Repeat" part of the recipe).

Pour the feta white sauce over all, then top with remaining Manchego cheese. 

Bake at 350º F. for 25-30 minutes, until sauce bubbles and top begins to brown. Remove from oven, allow to cool about 5 minutes before serving.


I reckon variations will be made, according to what tangy cheeses are available any given week at ALDI, but otherwise, this is likely to become one of my preferred side dishes as long as I'm watching those carbs. 


Saturday, May 21, 2022

Lemon Stir-fry Chicken with Mushrooms and Baby Bok Choi

I've been working on a few more dishes I can eat – and serve up to people I love – which contain low carb content, low sodium, no gluten, and are easy and affordable (currently, although at the rate some prices are climbing, I'm not sure but that price will be the only consideration) for any occasion. So many stir-fry dishes end up getting scratched from my list for violating at least two of those issues, but tonight's dinner suits 'em all. 

I will admit, I did end up having gone out of my way for the baby bok choi (about 150 miles out of my usual shopping route, on a trip for another special occasion) but the adult version is still frequently available at stores around here, so it remains an option.

One advantage to a dish like this is, you spend only about 15 minutes at the stove. Stir-fry is nice like that. The bulk of the time is spent in preparation, i.e. chopping and marinating. 

I've set up this recipe to serve two, so you can easily adapt it upward to suit your needs. 

Here are few things you can do to make the advance preparation even easier: 
Use frozen chicken, allow to partially thaw in the refrigerator, so it remains firm enough to cut into small pieces. If all you have is fresh chicken, pop it into the freezer for about 20 minutes to a half hour, then bring it out to chop it.

When marinating the meat, put the mixture into a plastic zipper bag and push out all the air before completely sealing & refrigerating it.

Fresh mushrooms can be cooked up to a day in advance & refrigerated until just before final cooking time. 

If you really need to cut your carbs, I recommend serving this on riced cauliflower, because it and the bok choi are amazingly compatible. I'm lazy. I buy the shelf-stable, microwaveable pouches of "cauliflower rice" from Aldi, but you can prepare your own, if you're ambitious. Or you can buy the frozen versions. It's all good. 

And now for the actual recipe:


Not exactly a "foodie" shot. Call it a space-filler until I can get a better one.

Lemon Stir-fry Chicken with Mushrooms and Baby Bok Choi

Ingredients:

About 1/3 to 1/2 pound of boneless chicken (your choice. I used a mixture of thighs and breast "tenders")
2  Tablespoons fresh lemon juice
1/4 teaspoon fresh ginger, ground
1/4 teaspoon fresh garlic, crushed
1/4 cup water

1/4 pound fresh mushrooms, sliced (your choice again. I like cremini)
Great gobbets of butter (start with 2 tablespoons, & add more if you need – or, if you're concerned about cholesterol, substitute 1 1/2 tablespoons of canola oil and 1/2 teaspoon of butter for flavor)

2-3 Tablespoons cooking fat (I use lard, because why not? You can use your favorite oil or butter, though I won't recommend olive oil for this)
1/4 cup sweet onion, diced
1 egg, separated
1 cup bok choi, stem section sliced thinly, green leaves coarsely chopped
salt & pepper to taste

Directions:

Cut chicken into bite-sized pieces (about 1/2 inch thick by 1 inch "square". Your choice in the cut of meat will help define actual dimensions).
Mix lemon juice, ginger, garlic, and water in a small bowl or zipper bag. Add chicken. Allow to marinate at least 45 minutes.

In a wok or frying pan at high heat, melt butter and add in mushrooms, stirring more or less constantly, until the pieces begin to brown and crisp around the edges. Remove from heat, set aside in a bowl.

Separate egg, set aside yolk for now.
In small bowl, using a fork or whisk, beat egg white until lightly frothy. Add to chicken and marinade.

In hot wok, add cooking fat and onions, cooking until the onions are just transparent. Stir in the chicken and all the marinade, stirring briskly so that the egg white spreads out well to cover & thicken the mixture. 

When the chicken is completely cooked, reduce heat to low. Mix in mushrooms, return to slow simmer. 

Stir egg yolk, then add into wok, stirring briskly so it doesn't curdle. This will make the "gravy" thicker & silkier without needing to add starch. 

Finally, add in the bok choi, and stir on low heat a minute or two, until the leaves begin to wilt.

Serve on rice (or rice substitute).


I like to serve this with a carrot-and-dried-cherry slaw for a brightly colorful side dish (I may post that recipe later). 

Friday, May 06, 2022

Flourless Whole-Citrus Cake


 I had a few blood oranges and a tangerine or two left over from another project I'd made a not long ago, & couldn't decide what to do with them, until I came across a series of recipes for whole-lemon and whole-orange cakes. Naturally, I had to try this, especially as I'm only 75% of the way through our birthday cake season.

Therefore, today is Flourless Whole-Blood-Orange (-and-Maybe-a-Tangerine-Because-Why-Not?) Cake week. 

It begins with a few thoroughly washed citrus fruits, a saucepan, and some water. 

It ends with dessert.


Flourless Whole-Citrus Cake

Ingredients:

Cake:
3 large lemons or medium oranges (or, as I did here, go for 3 small blood oranges and 1 small "Cutie" tangerine), divided (for optional icing)

3 Tablespoons Cointreau or other good orange liqueur 

6 large eggs, room temperature, separated

250 grams (approx. 1 1/4 cups) sugar

300 grams almond flour (finely-ground almond meal) 

2 teaspoons baking powder


Directions:

Thoroughly wash your citrus fruit, place in saucepan, and cover with cold water. Bring to a boil, drain, rinse, and cover again with cold water. Bring to boil again, then allow to continue boiling for 60 minutes. Drain, and allow to cool completely.

Cut fruit into quarters, remove seeds, place seedless fruit parts – peels and all – into food processor, and blend until smooth. Add Cointreau, mix in completely.  Reserve about 2 tablespoons for icing, if desired.

Line the bottom of a 9-inch springform pan with baking parchment paper (I usually give the parchment a quick spritz of water on each side so it's flexible and sets in place easily).

Preheat oven to 350º F

In medium mixer bowl, combine egg yolks and sugar, beating on medium until light and fluffy.  

In separate mixing bowl, whisk together almond flour and baking powder. Stir into egg yolk/sugar mixture along with 1 cup of fruit pulp. Set aside. 

Clean stand mixer's whisk attachment and bowl thoroughly to be sure they are oil-free (I recommend wiping down with vinegar-soaked paper towel) before placing egg whites in the bowl. Beat egg whites on medium until soft peaks form. Gently fold into the flour/pulp/sugar mixture.

Pour into prepared springform pan, smooth top, place on middle rack of oven, and bake at 350º F for 60 minutes* or until toothpick inserted in center comes out sticky but without crumbs.

Allow to cool completely, on cooling rack, before removing from springform pan. Top with icing (recipe below) or sprinkle with powdered sugar before serving.


 Icing (optional):

Ingredients: 

approximately 2 tablespoons citrus pulp (from above) plus 1 teaspoon Cointreau

juice of one small orange or two small tangerines, when combined with pulp, equalling 1/3 cup 

250 grams (about 2 cups) confectioners' – powdered – sugar † 

1 teaspoon butter, melted

Directions:

In a medium microwave-safe bowl, combine juice, pulp, and powdered sugar, whisking until smooth. 

Add in melted butter, whisk again until smooth and fluid (you can nuke it all for up to 30 seconds, if needed, but if you do, you'll need to allow it to cool a bit before the next step). 

Pour over top of cake. 

Serve or freeze within 2 days.


*If it looks as though the cake is getting too brown too soon, gently cover with foil for the last 5–10 minutes of baking.

†If you prefer a thinner or thicker icing, you can adjust the amount of sugar/liquid to your personal liking.


Further thoughts:
Having tasted the blood orange pulp

3 Blood oranges & 1 "Cutie" after boiling
& being run through the food processor,
with 3 TBS Cointreau yet to be added
(made about 1.2 cups total)

before I put it into the batter, I decided to give it a little extra subtlety by also using a portion of lemon sugar I'd had on hand since Christmas. It didn't change the weight, but if I'd been going for volume, the lemon sugar ended up taking up about 25-30% more room in a measuring cup, ounce for ounce – well, gram for gram, actually – than plain or ultrafine (caster) sugar. (I went with 200 grams sugar, 55 grams lemon sugar, just because.)

I'll have to try this with plain ol' lemons, sometime, or even Meyer lemons or straight-up tangeroonies, next time we get a big box of Cuties. Currently, all my fresh lemons are tied up in the making of a lemon meringue pie, though, so… blood oranges and tangeroonies it is. No complaints, though. Not. One.

Well, maybe one. 

Somebody doesn't like citrus

Saturday, April 02, 2022

Master Mixes: a Collection of Recipes from AD 1977

MASTER MIX  reverse


 Back in the days before The Bat returned to school to finish her Master's degree, she regularly attended Home Extension programs as they were offered locally. Somewhere in our files, we have the manual she brought home from a candy-making workshop, which we've had frequent occasion to dig up and put to use. This one… well, I should probably do more with it, since nowadays my activities are slightly more diverse than in previous years, and I could use the time saved from kitchen duties to pursue said other activities.

I'm not entirely sure the organization of these pages is a little bit confusing, or I'm just naturally confused. I think the first pair of mix formulae on page 2 are supposed to be what is referred to on page 13 as the MASTER MIX as is the handwritten one on the back of page 13 (above). 

I could be wrong, though. It has been known to have happened, long ago.

Still, even if I never actually apply these pages to my own life, perhaps someone else out in the wide world can find use for something here. And, if not, they're still a nice bit of modern history.

as always, click any image to embiggen. if you like what you see, please share


p 1: Extension contact information;
introduction to Master Mixes, 
caveats

p 2: more caveats;
HOMEMADE MIXES;
BISCUIT MIX;

P 3: HOMEMADE MIXES
CORN MEAL MIX; 
ROLLED OATS MIX;
PIE CRUST MIX

P 4: HOMEMADE MIXES
BASIC CAKE;
VARIATIONS:
Applesauce Spice Cake;
Banana Cake; Upside-down Cake;
Basic Chocolate Cake;
sub-category variations
Coffee Cake; toppings


p 5: HOMEMADE MIXES
MASTER MIX FOR COOKIES;
Toffee Bars; Fruit Jumbles;
Peach Upside-down Coffee Cake;
Cookies – Crescent

p 6: HOMEMADE MIXES
Peanut Butter Refrigerator Cookies;
Brownies; Muffins;
Pancakes; 
PUDDING MIXES
Vanilla; Caramel; Chocolate;
Pudding
White Sauce Mix & variations (part 1)

p 7: HOMEMADE MIXES
White Sauce Mix & variations (part 2);
Chili Seasoning Mix;
CONVENIENT MIXES
Tang Tea Mix; Instant Russian Tea;
Instant Cocoa Mix; 
Instant Hot Chocolate Mix; Cocoa Mix

p 8: HOMEMADE MIXES
Spaghetti Sauce Seasoning Mix;
Onion Rice Mix;
Spanish Rice Mix;
Sauce Mix for Skillet Dinner
("hamburger helper")

p 9: HOMEMADE MIXES
Country-style Granola;
USING CAKE MIXES
Chocolate Chip Cookies

p 10: HOMEMADE MIXES
USING CAKE MIXES
Pilgrim Cake;
Banana-Coconut Cream Cake;
Double-Dutch Intrigue Cake;
SEASONING MIXES Intro

p 11: HOMEMADE MIXES
SEASONING MIXES
For Fish; For Poultry;
For Salads;
ZIPPY CASSEROLE TOPPING MIX;
further advice on storage and use

p 12: "can blend shortening
in with potato masher"

p 13: Some recipes using MASTER MIX


Saturday, March 26, 2022

My Heretofore Unwritten Rule

I learned from my mom, The Bat, who learned from her aunt (essentially her foster mother) that, when cooking or baking for a special occasion (holidays, birthdays, Tuesdays, etc.) one should always make enough for the surprise visitor. This rule is also useful if, like me, you have a little problem with depth perception and balance… 

Even though the cookie sheet hit the floor, and one of the little pie pans was upended on it, splashing meringue and lemon filling all over the rug and on the wall beside the oven, I had (up until that moment) foolishly made a double batch of both filling and meringue, thinking I could also offer a few mini-pavlovas to be filled with some of the extra lemon curd, just in case. 

But the case was, instead, one of reassuring myself that the pan and the best of its contents had not actually hit the floor to pick up cat hairs and whatever, refilling the crust with some of that extra curd, splooping on some meringue (and pretending I had not emitted a good, old-fashioned, monosyllabic word carried down from the days before the Saxons altered the way people spoke, in the British Isles), and popping the semi-restored unit into the oven to turn it golden brown.  

The operation was messy, but the patient seems to have survived. Plus, my fitness tracker says I got a serious cardio workout…


I have no idea how well the crust held up through the process though, under all that fluff. 

Maybe we'll find out tomorrow. Maybe we won't notice or care, because lemon meringue pie obliterates many bad thoughts, even if ends up more of a lemon meringue trifle. 

Besides, the big one, so far, is neat and pretty! Cross your fingers it stays that way until dinner tomorrow.


So now my unwritten rule has been written: "Excess" will also be called a safety net. And there's still a bit of lemon curd in the fridge. Because reasons.


Monday, March 21, 2022

Vintage Cookbook: Good Things to Eat (part 1 of 5, beginning–pg 44)

 As part of my ongoing project of digitizing my vintage/antique cookbooks so I can consult them for recipes without worrying about more spills hitting the pages, I've scanned and cleaned (sort of) the pages of this little gem: 


Good Things to Eat, compiled and published by The Domestic Science Class, Peoria (Illinois) Women's Club. My copy of this book was much abused before it joined my library. There is no title page, no copyright information (and so, no date I can use to tell you precisely how old the book is). The best I can do is hazard a guess or two, based on the condition of the book itself, and of the items tucked amid its pages. 

Begin with the condition of the book: it's a two-ring-binder which, when I first picked it up, was already almost literally hanging together by a thread (I think I counted about eight remaining on the back, while the front cover was completely detached). By the time I opened it to study the contents, the least bit of handling caused the last threads to surrender. 

The pages, too, have seen better days (although I've seen worse). Many of what once seem to have been dark blue ink printed on light blue paper are splotched, foxed, and all are badly yellowed, as were the newspaper clipping and the instruction sheet between the pages of the canning section. I chose to convert most of the book's pages to basic black and white images for maximum clarity. Also, here are the extra pieces:

I like my chocolate cake very dark brown…


here's the back of the
cake article, 

in two parts.


Sure-Jell. We've been
depending on it…

…FOREVER

These would indicate my copy of the book is at least 85 years old, and quite possibly older.

Back to the book itself, and something about the way I'm posting it:

At the end of each chapter, the authors included two leaves of blank pages for "MY OWN RECIPES",  a few of which the original owner did take advantage of. The rest, being blank, I deemed non-essential for these posts. I have not disposed of the actual pages, but ask that you use your imagination as you scroll through here: where you come across a single pic, understand it was originally accompanied by more, so the pagination is not as completely befouled as it first appears. 

I do hope to preserve the original, in all its remaining pieces, so I've put the front and back covers into the outer pockets of a pair of acid-free 7"x9" binders, and tucked the pages inside, in acid-free sleeves of a corresponding size.


Storing the spine will be an issue for another day, when I can play in Pop's workshop (or ask him to engineer something for me). 

But most of all, I can now peruse the pages without worrying about more corners crumbling in my hot little hands, and I hope you'll enjoy doing the same, here.

Without further ado, let us begin.


as always, click any image to embiggen it, and, if you like what you see, please share


Inside front cover, explaining the loose-leaf format

English Walnut Toffy (part 1)

English Walnut Toffy (part 2)


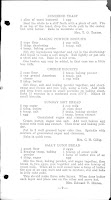
I left this first BREAD page untouched (more or less), other than to boost contrast for legibility and ramp back the yellowing a little. Just in case you wondered what these pages look like in real life.


p 7: BREAD
Apple Pancakes; 
Mother Sibley's Griddle Cakes;
Aunt Polly's Sour Milk Griddle Cakes;
Raw Potato Pancakes; 
Parker House Johnny Cake

p 8: BREAD
Old Fashioned Buckwheat Cakes;
Johnny Cakes for Breakfast;
Waffles; Sour Cream Waffles;
Crisp Waffles

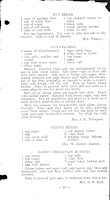
p 9: BREAD
Sunshine Toast; 
Baking Powder Biscuits; 
Cheese Biscuits; Sunday Hot Bread;
Sally Lunn Bread

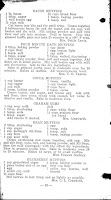
p 10: BREAD
Orange Bread;
Grape Nut Bread; Corn Bread (1);
Corn Bread (2); Graham, Bran Bread

p 11: BREAD
Bran Bread; Steamed Brown Bread;
Boston Brown Bread Steamed;
Baked Brown Bread; 
Rolls and Coffee Cake

p 12: BREAD
Ice Box Rolls; Denver Rolls;
Biscuits; "Kneadless" Ice Box Dough

p 13: BREAD
Corn Flake Nut Bread;
Cocoa Bread;
Raised Nut Rolls;
Rolls (1)


p 14: BREAD
Rolls (2); Butterscotch Rolls;
Nut Bread (1); Nut Bread (2)


p 15: BREAD
Nut Bread (3); 
Nut Tea Ring; Peanut Bread;
Dainty Breakfast Muffins

p 16: BREAD
Bacon Muffins; 
Four Minute Date Muffins;
Cocoa Muffins; Graham Gems;
Bran Muffins; Blueberry Muffins


MY OWN RECIPES


p 21: CAKES
Orange Cake; Orange Icing;
Delicious Cake; Lightning Cake;
Sunshine Cake (1)

p 22: CAKES
Sunshine Cake (2); 
Feather Cake; 
Sour Cream Cake; 
Whipped Cream Cake;
Caramel Cake


p 23: CAKES
Sunshine Layer Cake; Filling;
Macaroon Cake; Frosting;
Caramel Cake; Caramel Flavoring;
Coconut Cake

p 24: CAKES
Golden Angel Food Cake;
Swansdown Delicious Cake;
White Cake; Angel Food Cake

p 25: CAKES
Washington Pie; Cream Filling;
Pond Lily Cake; Filling;
Sponge Cake (1)

p 26: CAKES
Mock Angel Food Cake;
Sponge Cake (2);
Never-Fail Sponge Cake;
Yellow Frosting;
Graham Cracker Cake 

p 27: CAKES
Prune Cake; Prune Cake Filling;
Apple Sauce Cake;
Whole Wheat Apple Sauce Cake;
Fudge Cake

p 28: CAKES
Devil's Food (1);
Feather Chocolate Cake;
Scotch Chocolate Cake;
Delicious Chocolate Cake;
Devil's Food Cake (2)

P 29: CAKES
French Chocolate Cake;
Chocolate Nougat Cake; Boiled Icing;
Eggless Devil's Food;
Devil's Food Cake (3)

p 30: CAKES
Cocoa Cake;
One Egg Chocolate Loaf Cake;
Chocolate Mocha Cake;
Date Nut Cake; Icing

p 31: CAKES
Date Loaf; Delicious Date Cake;
New England Eggless Cake;
Eggless Butterless Spice Cake;
Mashed Potato Cake

p 32: CAKES
Hot Mashed Potato Cake;
Spice Cake; Ginger Bread (1);
Ginger Bread (2); Fruit Cake (1)


p 33: CAKES
Fruit Cake (2);
Eggless, Butterless, Milkless Fruit Cake;
Peanut Bar Cake; Nut Cake


Sounds joyless, too…
 
 
p 34: CAKES
Silver Nut Cake;
Nut Cake

MY OWN RECIPES
Swans down cake

p 39: CANDY
Candied Grape Fruit Peel;
Burnt Almonds; Creamy Fudge;
Fudge (1); Fudge (2)

p 40: CANDY
Never-Fail Fudge;
Divinity Fudge;
Peanut Butter Fudge;
Mexican Caramels;
Opera Caramels


p 41: CANDY
Divinity Candy;
Salt Water Taffy
MY OWN RECIPES 
Grape Juice


For the rest of the pages to this cookbook, you can scroll down through the next few posts, or you can click to find part 2 here, part 3 here, part 4 here, and the conclusion (part 5) here.