Raiding the larder of ideas.

What one family eats, plans to eat, dreams of eating. Plus, other food and kitchen-related stuff from the home of steak-and-potatoes, pie and fresh green beans from the garden.

Wednesday, December 30, 2015

Cinnamon Christmas Stars, aka Zimtsterne

This is one of those recipes which is not outrageously expensive, and yet is outrageously tasty and outrageously easy to make – the latter especially so, if you have a young'un or two around the house who happen to be willing to help out with the cutting and slathering with icing. But even without my having assistance of Ilex, 


this Christmas treat is one I'll be making regularly…possibly even outside the holiday season. It's that good. Plus, it's gluten-free by its original design, so there is that, as well. I don't have to worry about remembering to adapt my freezer-full of flours to meet the current needs.

I do recommend bringing out your most accurate kitchen scales before you get started, too. Not only is it what the original recipe called for, but I find that – as professional bakers have assured me – dry ingredients may vary wildly in their density from one milling to the next, so one cup of something one day may be 10% heavier than the next day, so you'll have less predictable results.

However, I will need to study further, to see if they can be made with alternative sweeteners, for my other friends who are on low- or no-sugar-added diets. But, as a certain non-German woman once said, "I'll think about that tomorrow." I'll finish eating giving away these, first.

Heh.

Meanwhile, here's what we have: starting with this recipe, and adapting slightly to our kitchen. 

Zimtsterne (Cinnamon Stars)

Ingredients:
3 egg whites
250 grams powdered sugar
360 grams finely ground almonds or almond flour (I used non-blanched for this batch)
2 1/2 tsp cinnamon
Fresh, finely-grated zest of 2 small lemons (about 2 Tablespoons)
Pinch of salt

Directions:
Make sure your mixer bowl and whisk attachment are completely clean and free from any oils before you start. (I recommend washing, drying, and then taking a paper towel or cloth moistened with cider vinegar to wipe it clean again, to be doubly sure.)

In that bowl of your stand mixer, using the whisk attachment, beat egg whites until they become foamy.

Begin adding the powdered sugar in small batches (a few tablespoons at a time) while the mixer is running. Beat on high until the meringue is very shiny, but before very stiff peaks form. This may take ten minutes or more, so be patient.

Remove 50 g of the meringue (about 1/3 – 1/2 cup) to a small bowl, cover and refrigerate.

Next, in a medium bowl, whisk together the ground almonds (or almond flour), cinnamon, lemon zest and salt. 

Fold dry ingredients into the remaining meringue mixture until just evenly distributed, and no more. (If it feels really thick and dense, don't worry. This recipe bakes up light, almost airy cookies, despite its feeling like you're stirring nearly-hardened concrete.)

Tip the contents out onto a large sheet of parchment paper sprinkled with powdered sugar. Sprinkle the top of the mixture with some more powdered sugar and top with another sheet of parchment paper. Roll out the dough to just under 1 centimeter thick. Refrigerate 1/2 hour to an 1 hour, to help firm up dough and reduce its stickiness.

Once sufficiently chilled, remove from refrigerator, peel off the top sheet of parchment and sprinkle again with a bit of powdered sugar.  Coat your star cookie cutter with nonstick spray and wipe excess away. Then, dipping your cutter into powdered sugar each time, cut out the stars and place fairly close together on a parchment-covered cookie sheet (they don't expand very much). Continue to collect the dough into a bowl and roll out until all is used up.

Preheat the oven to 300° F., or 150º C.

Using an offset spatula or a knife (I use a tapered icing spatula, for more precise application on the star points)  spread the remaining meringue mixture evenly across all stars, making sure it doesn’t drip down the sides. Place in oven and bake for 8-10 minutes. Keep an eye on them --  you don't want the meringue to brown, just cook and crisp up a little.

Let cool on the cookie sheet for 5 minutes and then transfer to a cooling rack. Allow to completely cool. Store in an airtight container for up to a few weeks.

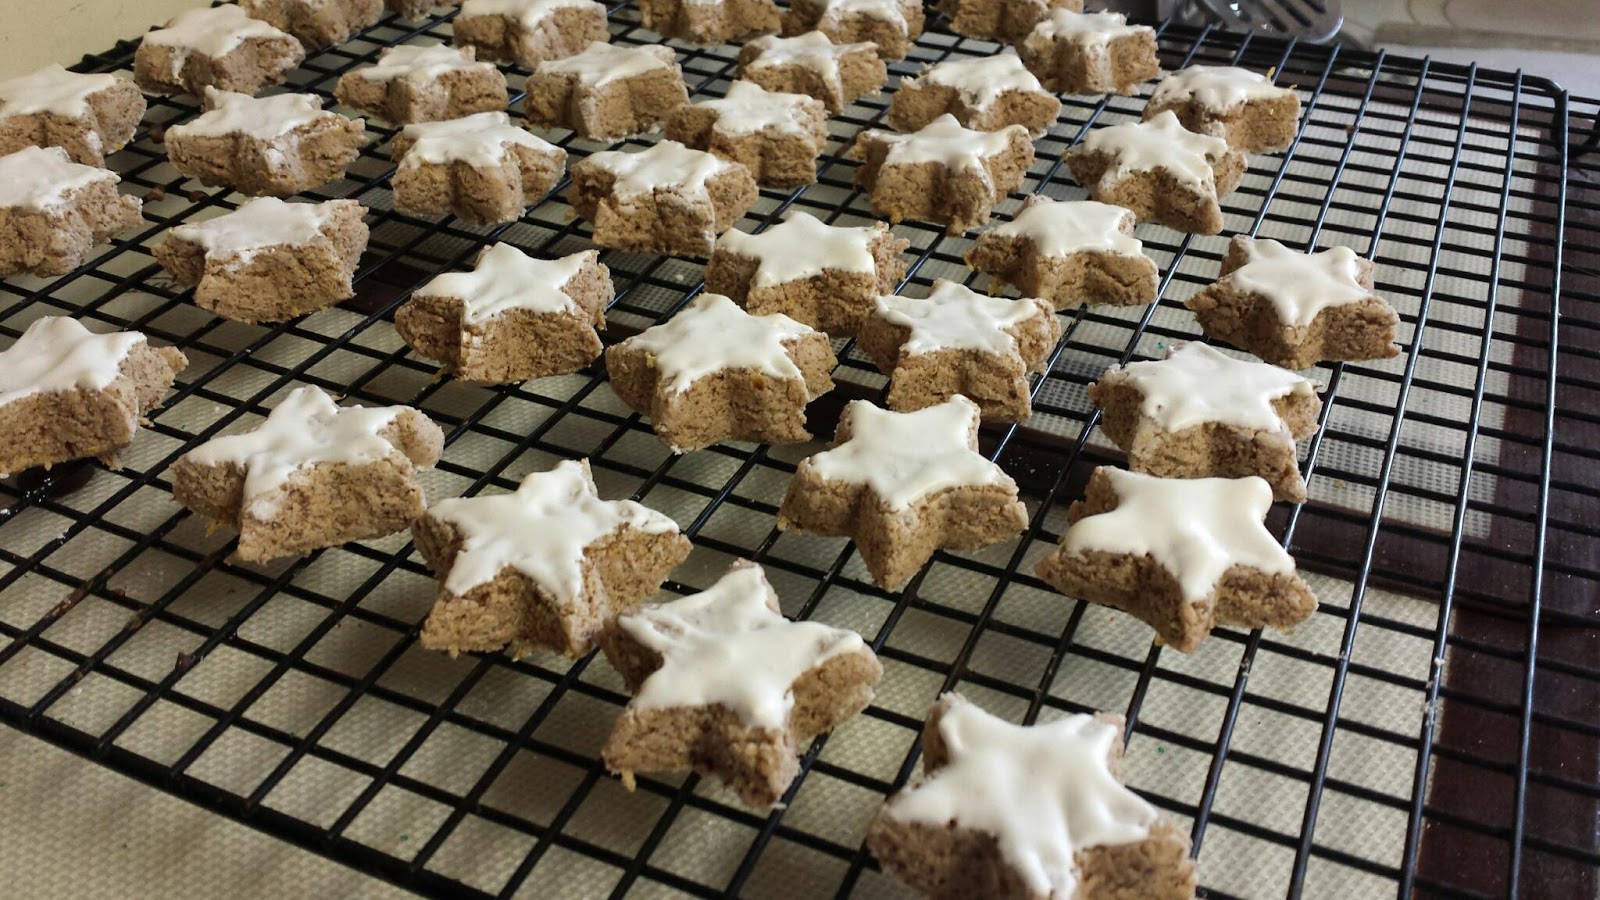
Makes about 50-75 6cm (roughly 2 inch) 2-bite stars. Larger cookie cutters will, obviously, make fewer cookies, and be slightly less challenging to get unstuck from the pointy parts of the cutter. 


Update: I've given a try to substituting an artificial sweetener for another batch (1 cup Splenda instead of the sugar). The flavor is as good, and the cookies are as tender as the regular ones (if a wee tad drier on the tongue), but it seems that the Splenda-based meringue topping, when left to sit in the refrigerator for a while, tends to curdle. This may mean I over-beat the eggs (easy enough to do when you're whipping eggs without sugar), but I think I'd like to give a try to separating out one egg white in advance – or measure out prepackaged egg white – and whipping that up with sweetener, only after I've allowed the dough to chill, and I'm ready to cut the stars.
They're not as pretty as the real sugar version, but I'll have no qualms about noshing on them, or sharing with others…if I have to.

Monday, August 24, 2015

So I Bake with a Sody-Pop, or, A Simple Cake Made Somewhat Complicated

I decided to run an experiment, today. For the past couple of years, the thing that's been all over the internet is the cake made from one box of cake mix and one can of pop (soda, to you on the coasts, and for my friends & family south of the Mason-Dixon, whatever flavor of Coke you have).

Well, I have gluten-free cake mixes, and they require a slightly different treatment from the regular mixes: where the usual Duncan Hines and such call for water, oil and eggs, the Aldi yellow cake mix ups the ante and calls for milk instead of the water.  And, so, to the powdered milk box I went, and added 1/3 cup of dry Carnation brand. Plus, I put in some powdered egg equivalent to three actual eggs sans liquid, two tablespoons of butter powder, and a trace of cinnamon. Because.

My choice for pop was one which, around here, is only occasionally to be found at the Big Lots stores, and I like drinking it so much I was reluctant to risk it in such a manner, but, nothing ventured...

And, of course, I couldn't leave well enough alone, so I plumped and tenderized some dried cranberries in hot water (okay, I plunked them into water and nuked them for 90 seconds, until they started to boil), then drained them and tossed them in brown sugar and cinnamon, to be strewn throughout and more on top.

Sometimes I could probably use a supervisor to tell me when I'm making things unnecessarily complicated, especially as involves the brainless cake. After all, the point of this was supposed to be to see if I could make a tasty cake with just a box of gluten free mix and a bottle of pop. 


But I think I can safely say that it is possible. Just not by me.


Simple cake made complicated (sort of)

Ingredients:

1 box gluten-free yellow cake mix
1 (12-ounce) bottle of your zippiest ginger brew or ginger ale
1/3 cup powdered milk
6 Tablespoons powdered egg
2 Tablespoons powdered butter
3 teaspoons cinnamon, separated
1/2 cup dried cranberries, plumped in hot water and then drained
2 Tablespoons brown sugar or brown sugar substitute, plus a little more for decoration

Directions:

With the rack in the center of the oven, preheat oven to 350º F.

Grease the bottom of an 8"x8" cake pan, then line bottom of pan with parchment, and lightly grease that (you can trim off the flaps, if you want, but I like to leave them there, to help with removing cake from pan later on, as well as removing parchment from cake).

In a medium mixing bowl, whisk or sift together all the dry ingredients except the brown sugar and 2 teaspoons cinnamon, until they are completely mixed.

In a small bowl, mix together the cranberries, brown sugar, and remaining 2 teaspoons cinnamon.

Fold in the soda pop with a rubber (or silicone) mixing spatula.

Pour half the batter into the pan. Sprinkle about 1/3 of the cranberry mixture across the surface, then pour the remaining cake batter over that, and sprinkle the rest of the cranberry mixture on top. If desired, top with a light sprinkling of more brown sugar, to create a sparkly crust (it gets a little bit that way on its own – it's the nature of this mix already to be faintly crisp-topped).

Bake at 350º F for 41-45 minutes, or, until a cake tester inserted in the center comes out clean.

Allow to cool completely in pan on cooling rack.

Serve with cinnamon/ginger whipped cream or a small scoop of ice cream and some cinnamon sugar.

Tuesday, July 21, 2015

I Scream...Well, You Know the Rhyme

Yesterday morning, just as she was getting ready to fix herself some lunch, and I was considering finishing that last 40 winks, The Bat got a call inviting us to sup with the extended family. When asked what we could contribute to the meal, the subject of dessert came up.

They like it when I bake.

Go figure.

Well, this time, I'd been seeing all my friends on social media sharing the simplest process for making ice cream without a churn. It promises that any idiot can make awesome stuff with only three ingredients, a mixer, and some room in your freezer.

And it's true. You can make a lovely, tasty ice cream with a pint of whipping cream, a 14-ounce can of sweetened condensed milk, and your flavor of choice. Some people go chocolate, some vanilla, some even go all coffee-crazy. The recipe adapts to your tastes.

What it doesn't necessarily do is make something lighter than a brick, once it's been in the freezer a few hours. Unless you disregard the instructions everybody gives you, where they say, "just dump everything into your mixer's bowl and whip it all light and fluffy like unicorn toots."

Okay, I added the simile. There are no unicorns mentioned in their promises.
But promises of fluffy, creamy dessert fall short, too. Dumping a can of sweetened, condensed milk into a bowl with a pint of whipping  cream is likely to make a sort of a sweet fatty goo. I know. I did it. No matter how long you beat this stuff, if you don't prep, you get uncooperative dairy products.

So, prep. Prep. Prep.

To make ice cream sandwiches using a variation on my favorite chocolate cake recipe, you'll need three (3) 12 inch by 17 inch jelly roll pans (also known as sided half sheet pans). I am specific about the size, because the cake batter will be stretched too thin by the 13 x 18 inch pan.

Line one cookie pan with plastic wrap and place in center of deep freezer, along with large mixing bowl and whisk attachment or beaters.

You will also need to refrigerate the whipping cream and sweetened condensed milk. Seriously. Put those cans in the fridge at least an hour before you start making the recipe.

While the dairy chills, take out your eggs for making the cake. The recipe calls for a full dozen egg yolks and ten egg whites, and I have all the grace of a circus bear, so, invariably I will let some yolk break while separating at least one egg for the meringue base to the sponge cake, so I bring 14 eggs out. If you feel brave, confident, reckless, stick to a dozen. But if you're like me, plan for the worst-case scenario.

All right. The dairy is chilled, the bowl and beaters are effing cold,  and you are ready to start.

Ice cream sammiches

Ingredients for ice cream:
1 pint (4 cups) whipping (or heavy) cream
2 cans (14 oz each) sweetened, condensed milk
1 Tablespoon orange liqueur (optional)
1 teaspoon vanilla 

Directions for ice cream:

In deeply chilled mixing bowl, pour whipping cream. On medium speed with chilled beaters or whisk attachment, beat cream until light and fluffy, about 4 - 5 minutes.

Add in orange liqueur, continuing to beat until mixed in.

With mixer still running on medium, gradually stream in the condensed milk until completely combined.

Quickly transfer to the half pan you've had waiting, lined with plastic, in the freezer. Cover with another sheet of plastic wrap, and allow to chill at least three hours, until firm.

And, now, the cake.

Cake ingredients:

12 eggs, separated
3/4 cup granulated sugar
3/4 cup extra fine granulated (bartender's) sugar (may use regular granulated)
1 cup plus 2 Tablespoons extra dark cocoa powder
3 Tablespoons orange liqueur like Grand Marnier
1 teaspoon vanilla 

Cake directions:

While the ice cream is chilling out, put the oven racks near center, and preheat your oven to 375° F. Line your remaining two jelly roll pans with parchment and grease the parchment well.

In a large mixing bowl with whisk attachment set to high speed, beat the egg yolks with 3/4 cup granulated sugar until light and fluffy, about 5 minutes. add the orange liqueur and vanilla, mix in completely, then lower the speed of the mixer to slow, and add in the cocoa powder. Mix completely, then transfer to a medium bowl and set aside for the moment. (I cheat. I have two stand mixers, so I do both yolks and whites at the same time. It knocks about 10 minutes off the prep time, is all.)

Thoroughly clean and dry the large mixing bowl and whisk attachment, then wipe thoroughly with paper towel dampened in vinegar. Whip the dozen egg whites until they begin to become foamy, then, with mixer running on medium, add a slow stream of sugar until fully mixed in. 

Continue to beat until firm peaks form.

Once you have made the batter, divide it evenly between the two pans, bake about 15 minutes, or until it springs back from a light touch near the center (this is one time when slightly over-baking a sponge cake is not a crime).

Allow to cool completely in pans on cooling racks, then turn out onto fresh parchment on a flat cookie sheet or cooling rack. This cake will settle considerably in the center. If you want to make the edges even all the way around the ice cream bars, you can trim the bulbous edges away using kitchen shears (knives will likely leave a rough, torn-looking edge). (Personally, I like the extra cake with my ice cream.)

Place in deepfreeze until ice cream is completely set up and cake is slightly frozen.

Stack layers*, cut with large knife (you may want to dip the knife in warm water and then wipe clean between each slice), serve immediately, or wrap individual portions in plastic or parchment, and freeze for up to 5 weeks.


*When I was assembling my sandwiches, it was hot enough that the ice cream would have melted and squished out the sides when trying to cut through the frozen top layer of cake, so I pre-cut the top cake into 3-inch squares using a very large knife. Then I brought out the ice cream, removed the top sheet of plastic, and flipped the thing out onto the top of the bottom cake layer, removed the other sheet of plastic, then recruited The Bat to help adjust the thing, and quickly arrange the cake "tiles" on top of the ice cream layer before slicing the rest of the assemblage between those cake "tiles".
Dessert of Champions

Back into the freezer it went until just before I was ready to finish with the cutting into squares, transport (in Tupperware cookie boxes lined with parchment, buried in bags of ice, in our trusty monster cooler) and serve.

Saturday, July 11, 2015

Snowflakes In July

There was this lemonade....

They look naughty, don't they? They probably are…but who cares?

Well, really, there was this can of frozen lemonade concentrate. It sat in the back of the freezer, calling out my name. But the weather has been surprisingly cool, for July, so I haven't felt justified in taking up space in the refrigerator with a half-gallon jug of a beverage we'd all just sip at for the next week, so I needed another excuse.

Plus, I hadn't tried anything new in the kitchen since the old fogeys got back from their early summer gadabout, almost two weeks ago.

Needless to say, I needed to bake some lemonade. It was as simple as that.
I found this recipe, not too long ago, and it cried out for a little gluten-free treatment.

The recipe refers to them as moist, and I will give them that, but in using gluten-free flour, no matter what you do, the nature of the cookie is likely to change slightly. There is probably a way to make them gooey and gluten-free at the same time, but today was not the day to spend an extra six hours and five bags of flour trying to find it. We had family coming for supper, and I didn't need to have the kitchen in chaos right before they arrived.

I worked with Pamela's All-Purpose Artisan Blend (bought via the famous largest internet retailer), this time, and it created lovely, tender treats which melted in my mouth. As I work things out, I find I like their flour almost as much as I like King Arthur's Gluten Free…actually, I think I like it more because I don't have to add xanthan gum to make it hold together the way a regular wheat-based flour will. It's already in Pamela's blend. 

Also, slightly less money.

At any rate, these were a lovely, light dessert for the crowd.

Seriously.

Like snowflakes. In July.

They look like dirty little snowballs, but melt like snowflakes. 


Lemonade Snowflakes

Ingredients:

For the cookies:
1 cup butter, softened
1 cup sugar
2 large eggs
3 cups gluten-free all-purpose flour
1 teaspoon baking soda
1/3 cup frozen lemonade concentrate, thawed and strained
Fresh zest of one lemon, finely grated (optional)

For the glaze: 
1/2 cup frozen lemonade concentrate, thawed
fresh zest of 1/2 lemon, finely grated (optional)
sugar for dusting (you can use powdered, colored, or other decorative sugar if you like. I just enjoy the look of frost on the cookie tops, with the plain granulated sugar)


Directions:

Arrange oven racks near center  of oven.

Preheat oven to 400º F

In a medium or large mixing bowl, cream the butter and sugar until light and fluffy.

Add in eggs, one at a time, beating well after each addition.

In a separate bowl, whisk together the flour and soda.

With mixer at low speed, alternate adding in the flour mixture and the lemonade concentrate, until it is all completely mixed together. You may need to stop the mixer and scrape down the sides of the bowl a couple of times in the process.

Scoop by approximate teaspoonfuls onto an ungreased baking sheet. (I used a #60 portioner – a 2 tsp scoop. If you do the same, be prepared with a bowl of hot water to dip it occasionally, to help the dough release. It will not adversely affect the flavor or texture of the GF cookies.)

Bake for 8 minutes. 

While the cookies are baking, arrange parchment, foil, or other "dribble-catcher" layer beneath your cooling racks.

Remove cookies from oven. Using spatula, transfer cookies from baking sheets to cooling rack.

While they are still warm, brush cookies generously with remaining lemonade concentrate, then dust with sugar. 

May be served warm, or refrigerated for maximum summer lemonade chill effect.

Makes about 70 bite-sized cookies.


I can't imagine who stole that cookie from the back row…she said all innocently.

Friday, May 01, 2015

The Perfect Meal Cookie : The Oatmeal Standard

I learned too late to do anything about it, that yesterday was National Oatmeal Cookie Day.

Only lightly speckled with dried cranberries… but plenty of pecan chunks.

Imagine the heartbreak in our house, to have missed the opportunity this year to honor such a great food! After all, it is the perfect meal, if you want it to be…egg & nut protein, fiber from the oats and the fruit, and, of course, outrageously edible…if one wanted to, one could even give it real muscle by adding bacon crumbles. Or, you can leave it alone as a tasty dessert treat. Which my family prefers. Even when we miss the holiday. As we did yesterday.

Well, rather than allow this tragedy to go  unaddressed, today I decided to simply pretend it was still yesterday. I asked The Bat for her old stand-by recipe (a battered photocopy of an Ann Pillsbury recipe published at least as long ago as the first year my folks were married, more than a half century ago), and got to work.

Along with the plan of baking a heap of treats, I also gave a test to my most recent gluten-free flour purchase. I'd already tried Bob's Red Mill 1:1 GF, and it was good, but I like to be thorough. And I'm rather glad I was.

I like the texture and taste even of the dough made using the Pamela's flour, and the cookies…most assuredly a repeatable experiment. The one issue I had was that they didn't turn out chewy, the way regular wheat-based flour does. The under-baked cookies still ended up very crumbly, not at all gooey. But then, it's a small sacrifice, considering these were awesomely tasty. I suppose I might consider adding chocolate chips, or even white chocolate chunks, but I don't think it's all that necessary.

These are truly tender and tasty all by themselves.

I could have sworn I had two full dozen, not twenty minutes ago…

Oatmeal Cookies

Ingredients:

1 1/2 cups all-purpose flour
1 1 teaspoon double-acting baking powder
1/2 teaspoon baking soda
1 teaspoon salt
3/4 cup butter at room temperature
1/2 cup granulated sugar
1 1/2 cups firmly packed brown sugar
2 eggs, unbeaten
1 teaspoon vanilla extract
2 1/2 cups quick-cooking oatmeal
1 cup chopped pecans
1 1/2 cups dried cranberries
1 cup mini chocolate chips (optional)
1 cup white chocolate chips or chunks (optional)

Directions:

Set oven racks near middle of oven. Preheat oven to 375º F. Lightly grease at least 2 baking sheets.

In a small mixing bowl, sift together flour, baking powder, soda, and salt.

In larger mixing bowl, cream butter and then add sugars gradually, mixing to cream well.

Add eggs and vanilla, beat in well.

Completely mix in sifted dry ingredients, then add oatmeal, pecans, and, finally, dried cranberries (and, if you are adding them, now is the time for the chocolate chips. I passed, this time).

Drop dough by heaping teaspoonfuls onto a lightly greased cookie sheet (I use a 2-Tablespoon dough scoop), leaving about two inches between dough balls.

Bake 12 to 15 minutes, or until golden brown.

Remove from oven. If using gluten-free flour, allow to stand on baking sheet at least one minute to set up.  If using regular all-purpose flour, remove from baking sheet with thin spatula, finish cooling individually on rack. Be careful - they are tender and break apart easily!

See the one to the left of center? It cracked, and had to be eaten immediately…a pity, really.
Makes about 5 dozen small (2-bite) cookies, or about 3 dozen larger cookies.


Friday, April 17, 2015

Fluffy, Soft as a Cloud Soufflé Cheesecake (aka Japanese Cheesecake)

Topped with cherries in syrup. Like pie filling on a fluffy cheesecake.
For Pop's birthday, The Bat and I usually collaborate on a lemon meringue pie. For the birthdays of the young'uns, I go all out and build the cakes aimed to surprise them all.  For my birthday, I get to make my own dessert, too. I know, I know, this is all a surprise to my loyal readers (all two of you). It's a sort of rule in our house that, if you have any kitchen skills at all, and you want a cake on any birthday past your twelfth, you either go hit the local bakeries for a stock ice cream cake, or you can get fancy and make your own.

I can't eat the storebought ones. I like them, but they don't like me.

So I get to go crazy in the kitchen, and make my own.

The upside to this is that I can have whatever kind of dessert my little heart desires, and I can make it with no wheat, no other allergens, and few worries about, well…whatever.

The downside is, I have to choose between fluffy sponge cake, cheesecake, and pie. Or not.

Today, I decided to go into full, head-on hybrid mode. I made a cheese sponge cake (or, as it's known in more edumacated circles, a soufflé cake or a Japanese cheesecake), and top it with a nice pie-filling-like fruit (The Bat has some strawberries, and I have dark tart cherries). This puppy has the texture of a light and airy sponge cake, the tang of a cheesecake, and…fruit.

And I made a sour cream whipped cream topping to add to the decadence, for those people who think a birthday cake needs some kind of frosting.

But there are no candles on my cake. I don't want to burn the house down.


Soufflé Cheesecake, or Cheese Sponge Cake

Ingredients:

1/2 cup + 2 Tablespoons ultrafine sugar
5 large (not jumbo!) eggs, separated
1/4 teaspoon cream of tartar (I substitute 1/2 tsp rice vinegar for my own, due to an allergy)
3 Tablespoons + 1 teaspoon unsalted butter
8 oz cream cheese
1/3 cup whole milk
1 Tablespoon fresh lemon juice
1/3 cup plus 2 Tablespoons Gluten-Free All-Purpose flour or GF cake flour
2 Tablespoons tapioca flour
2 Tablespoons corn starch
1/8 teaspoon salt

Directions:

Preheat oven to 325º F, with rack in center of oven.

Lightly grease bottom & sides of an 8"x2" round cake pan. Line bottom of pan with non-stick parchment. Fill a larger pan with water to about 1 centimeter, set aside.

In microwave or double-boiler, melt butter, cream cheese, and milk. Allow to cool to room temperature. Add in flours, corn starch, salt, egg yolks, and lemon juice. Mix well.

In a large bowl, beat egg whites with cream of tartar (or vinegar) until frothy. Add in sugar and whip until soft peaks form (everybody meringue!).

Add 1/3 of egg whites to cheese batter mixture, fold in completely. Add batter to meringue, fold in gently and carefully until the marbling is no longer obvious.

Scoop the mixture into the cake pan and smooth the top.

Place water pan in oven, then set cake into the water bath.

Bake cake 70 minutes, or until golden brown and set. Turn off oven. Do not open oven for at least 20 minutes. It will rise to better than double in size, but then settles back down and pull away from the sides of the pan.

Allow cake to slowly cool in oven, in water bath.

When completely cool, remove from pan by sliding a thin knife around the edges of the pan anywhere it may still be attached, to loosen the cake.

If you want to show the golden side up, turn cake out onto a plate by setting a plate over the cake in the pan and then taking a second plate, making a plate-cake-sandwich to then flip it.


It resettles once it cools down. While baking, it's a gigantic crown of gold.
 If, however, you'd like it to look less like a cakey-cake and more like a cheesecake, turn it out onto a plate and allow the golden-brown top of the cake to become the bottom crust of the cheesecake.

I like the way the parchment expanded and made these nifty striations on the base.
Refrigerate at least 3 hours before serving.

Decorate with a simple sprinkle of powdered sugar on the browned top crust (you can create a waxed paper stencil for it, or sprinkle through lace, if you want), and/or offer your favorite fruit or syrup (fruity or chocolate) as a topping, with some sour-cream-based whipped cream* (scroll all the way down).

One can not live on cake alone.


*I will recommend, though, that you let people know, in advance of their piling on the whipped cream, if you use sour cream in the mix. Otherwise, they may believe your cream has turned, and not that it's a more daring, tangy combination of flavors.

Tuesday, March 24, 2015

"C"is for Cookie, and for Coconut, too: Shortbread for the Rest of Us

While I was baking a pie crust from coconut flour, I began to wonder if I could make a tasty shortbread cookie from it, as well.

Long story short, it seems that I can. 

So can you.

A word of advice, though: if you have to refrigerate some of the dough for any reason, you will need to warm it back up on low power in a microwave oven before you can work it into balls. The shortening (butter or coconut oil recommended) needs to be pretty much liquified in the dough in order for the dough to hold together.

Also, they don't keep well. Eat or freeze within an hour or so of baking.


Coconut Shortbread Cookies

Ingredients:

3/4 cup coconut flour
1/2 cup butter or coconut oil, melted
3 to 4 Tablespoons honey (to taste)
1 teaspoon fresh finely grated lime (or lemon) zest
1/2 teaspoon real vanilla extract

Directions:

Preheat oven to 350º F. 

Line a baking sheet with parchment or a nonstick silicone liner.

In a small bowl, combine all ingredients, stir until it reaches a thick, pasty consistency.

Shape into approximately 1-inch diameter balls and set on lined baking sheet. With a fork, press down gently on the tops of the dough balls to flatten a bit. 

Bake about 7 to 10 minutes, until lightly browned – keep an eye on them, they will go from golden to dark brown very quickly! 

Allow to cool completely before removing from cookie sheet (handling the cookies while they're still hot will cause them to crumble).


Makes about 40 one-bite cookies.


Serve with light brunch of fruit compote and cacao nib "tea". Or whatever food and beverage floats your boat.

A Peach of a Pie... Peach Curd in a Coconutty Shell, and THEN Some

In case anybody had failed to figure this out, yet…I like food. I like to eat it, I like to look at it, I like to read about it, I like to photograph and paint it and I like to talk (and write) about it. But most of all,  I like to prepare it. Of course, nine times out of ten, when I prepare something, I'm expected to eat it, since I don't work for a professional kitchen (and, no, I have no real desire to do so, since I enjoy the freedom that a private home kitchen affords me).

Now is the season of birthdays in our circle, and this, of course, grants me the excuse to bake unabashedly, and with great variety, with fewer concerns about my own personal girth. The treats get shared, or even given away.

In this case, one of my long-time friends, like me, is on a restricted regimen…she's on an allergy- and celiac-diet – gluten free – and her daughter-in-law has been encouraging her to try, as much as possible, a paleo diet. Well, this isn't exactly paleo, except that the crust could get there, if one wanted to do so, but the entire dish is without gluten, and without other chemicals she has had allergies to. Plus, her husband is a fan of peaches and pies, so there is that. 

The crust is made using coconut flour (yes, there are recipes which use it as the primary flour!), shortening (in this case, butter, so, not exactly paleo, but ultra nibble-worthy, so I made two crusts & popped one in the freezer for later in the week), and eggs (with a little honey, just for the heck of it, but that's not essential to the structure). In essence, it's a pre-baked cookie crust.

The filling is a bigger project. I made a peach curd from peach nectar cooked way down, plus some flash-frozen peaches (thawed and pureed), some egg yolks, and a great honkin' amount of sugar… hey, it's a birthday pie! It's supposed to be decadent!

It was topped with more raw peaches steeped overnight in lime juice, then drained and coated with honey, and, finally, decorated with my favorite stabilized whipped cream topping. One could, I suppose, make it a peach meringue pie if one wanted, since the curd uses yolks and not the albumen, but I'm reserving the egg whites for next week's birthday chocolate sponge cake. Whippy cream it is, this time.


I made a double batch of everything, though, so one went home with the birthday girl, and the other is going on the table Friday evening for our weekly supper. I recommend you do the same, just because.


Coconut flour pie crust (single crust)
Ingredients: 
1/2 cup butter or coconut oil, melted 
2 large eggs
1/4 teaspoon salt
3 tablespoons honey (optional if this crust is for a savory pie)
3/4 cup coconut flour 
Directions: 
Set rack in oven to near the bottom. Preheat oven to 400º F.
Heavily grease a 9" pie pan. 
In a medium microwave-safe bowl, heat the butter or coconut oil at low power until almost completely melted (about 1 minute. If it's not near melting point, continue to heat in 20-second increments until all but a few lumps of solid remain. Remove from the microwave and allow the solids to gradually melt, and the shortening to cool slightly. 
Add eggs, salt, and honey and thoroughly mix. Add coconut flour and stir until dough holds together. 
 
Gather dough into a ball and pat into greased 9" pie pan, and prick the dough with a fork. 

Bake 8-10 minutes, or until lightly browned. Allow to cool before filling. 


And this is my latest choice for filling:


Peach Curd 

Ingredients: 
4 egg yolks
2/3 cup granulated sugar
1 cup fresh peach puree (or frozen, thawed)*
1 Tablespoon lime juice (or lemon, if you must)
6 Tablespoons butter, cut into small pieces
1/2 teaspoon pure vanilla extract


Directions: 
In a medium saucepan over medium heat, beat yolks with sugar, peach purée and lime juice. Simmer, stirring constantly, until it becomes thickened. 
Remove from heat, begin whisking in butter a few small pieces at a time. Stir in vanilla, then strain curd through a fine sieve. 
Pour into pre-baked cookie-type (sweet) pie shell or tart shells. Or, refrigerate it in a covered container and later you can spread it on your waffles, toast, etc. 

 *I actually started with a liter of high-quality peach nectar, and set it to simmer until it reduced to just over 1 1/2 cups (it took about 90 minutes on medium-low heat), and, since I was doubling the recipe, filled in by running a handful of frozen peaches (after thawing) through the food processor. But that's because I had time and curiosity. Using fresh or thawed peaches, you're likely to have a brighter color to the puree. The nectar darkened with some interesting near-caramelization as it cooked down. The flavor was darned spiffy.

It's too bad I don't have a good excuse to make a dozen of these for the family…just so I can keep licking the bowls, if nothing more.


Monday, March 23, 2015

Stabilized Whippy Cream Frosting, or Cool Whip™ Upgrade

This has all the texture of whipped cream, but, where plain whipped cream returns to liquid after only a few minutes to an hour, even in the refrigerator, this combination holds its whipped form for a very long time, even at room temperature. 

In fact, if you have a recipe which calls for "frozen whipped dairy (or non-dairy) topping, thawed," (aka Cool Whip™ or its knock-offs) use this, instead. You won't get all those peculiar preservatives, emollients, and other unpronounceable chemicals, but you will get everything else the recipe calls for. Plus, you can sweeten it to your own tastes, rather than let somebody else decide how much sugar is right for you.

But even more important for me, it made a magnificently light, not-too-sweet frosting for an anniversary cake of angel food and lemon. There was just enough tang to balance out the sweetness of the cake and the tartness of the filling. Plus, it held its own as a very pretty, fluffy frosting.

There's a Devo song in here, somewhere…


Stabilized Whippy Cream 

Ingredients:

2 cups whipping cream
2 (8oz.) bricks cream cheese brought to room temperature
3 Tablespoons lemon juice (or less, to taste)
4 Tablespoons (1/4 cup)  confectioner's (powdered) sugar, or more, to taste
1 teaspoon real vanilla extract


Directions:

Be sure your cream cheese is at room temperature by setting it out on the counter at least one hour before you are ready to begin whipping process. Also, chill large mixing bowl and its beater(s).

In a small-ish mixing bowl, combine lemon juice and cream cheese. Whip until fluffy and well-aerated. Set aside.

In the large chilled mixing bowl, on medium speed, whip cream until soft peaks (ones which will not remain upright) begin to form.

Add in the cream cheese.

Whip together on high until firm peaks are formed.

Add confectioner's sugar and vanilla, mix until combined.

Apply generously to sides and top of cake using icing bag and decorative tips, or just go wild with a spatula or spoon.* 

It's fluffy, not stuffy!

*As you can see, I couldn't decide which to do, so I went with both spatula and bag with star point. I'm a rank amateur with those bags, though, so…well, it was fun).


Update: I tried another variation on this theme, to go with a fluffy soufflé cheesecake: cut the cream cheese to only 4 ounces, and mix in with 1 1/2 cups of sour cream. Mix well, chill until slightly set up again (about a half hour). Whip the cream until foamy, add in the sour cream, and continue to beat until light and whippy. Serve immediately or keep chilled until serving.

The Anniversary Cake, with Tangy Lemon Cream Syrup and Candied Lemon Peel


It's a challenge, sometimes, for a rookie gluten-free cook to find enough variety in desserts that others will also enjoy. There's too big a temptation to, after discovering one treat which is a success, not mess with it any more, and just do small (or no) variations on it, ever after.

I probably could have done that with the chocolate sponge cake.  But this month marks the golden anniversary of the marriage of two very special people our family chose to include (and, more importantly, they chose to include us in theirs). Therefore, I needed to go a little outside my comfort zone.

Besides, we're also having the lemon meringue pie as a birthday cake for Pop at the same dinner, and a chocolate cake for another birthday in a couple more weeks, so I feel more than justified in making a nice, light, citrus-y cake.

So here I am, doing a variation on fridge cakes.

It starts, of course, with cake. The recipe I chose to do a riff on calls for a couple of store-bought pound cakes, which, of course, as a wheat-intolerant individual, I can not do. And, since my last project, only a week ago, involved a basic GF yellow cake, I was loath to go there again so soon. But I did have a very nice GF angel food cake recipe, and a couple dozen fresh large eggs in the kitchen, so, there, indeed, I went. Due to another of my peculiar allergies, though, where the linked recipe calls for cream of tartar, I needed to substitute a teaspoon of cider vinegar early in the whipping process, and add  a little extra lemon juice, as well. I also used the full amount of vanilla extract (powdered rather than the liquid.  I didn't want to wet the batter too much), since I like the combination of lemon and vanilla… just because.

When the cake was baked, completely cooled, and removed from its tube pan, I popped it in the freezer overnight, because it's easier to slice into layers when it's frozen (I suppose one could make angel food layers, and not worry about slicing a cake before frosting it, but the shallower the pan, the less light and airy the angel food seems to turn out, so, at minimum, bake it as deep loaves and turn this into a trifle by cutting it into chunks before slathering on the filling).


Gluten-free and fluffy as a nimbus cloud.
Once the cake is prepared, stage two – the garnish and the filling – must commence.

I include them both in the same stage, because they both involve lemons, and you will likely need the juice from one to complete the other, so plan accordingly.

Begin a day ahead, by making candied lemon peels:


Candied Lemon Peels 
Ingredients: 
4 lemons, washed carefully
2 cups water, plus more for blanching
2 cups granulated sugar
2/3 cups extra fine (bartender's) sugar* 
Directions:  
Using a vegetable peeler, remove the zest from the lemons in wide strips, being careful to avoid taking off the bitter white pith at the same time (if you do get pith'd on, you can take a sharp knife and slice or scrape it off when you're done peeling all the lemons). 
With a sharp knife, slice the zest lengthwise, in narrow julienne strips, about 1/8 inch across – or thinner.  
Fill a 2-quart saucepan HALFWAY with water, put the peels into the water, and bring to a boil on medium heat, reduce temperature and simmer 15 minutes. 
Drain peel in a sieve and rinse thoroughly. Carefully rinse out the saucepan to remove residue, return to stove containing 2 cups water, 2 cups granulated sugar, and bring to a boil at high heat, stirring constantly until the sugar is completely dissolved. When syrup boils, reduce heat to simmer and add lemon peels. Continue to simmer 15 minutes, or until peels turn translucent. 
While peels simmer, line a jelly roll pan (cookie sheet with sides) with nonstick parchment (or waxed paper, if that's what you have). 
When peel is cooked to transparency, remove peel from syrup using a slotted spoon, so the syrup will drain back into the pan. Arrange peel in a single layer across the parchment. Allow to cool to room temperature. 
Cover with extra fine sugar, turning with a fork (or, if you're like me, with the nearest set of chopsticks) until all sides of each strip of zest is completely sugar-coated. Transfer to a clean sheet of parchment and allow to dry about an hour, then store in an airtight container at room temperature for up to a week.

Then start making the Tangy Lemon Cream Syrup.


The lemon cream syrup was fairly simple: lemon juice, lemon zest, and sweetened condensed milk. I made my own sweetened condensed milk,


so it came out a little darker, an odder color than if I'd used the store-boughten cans, but it also had a slightly richer flavor and texture to start. But if you don't have all afternoon to simmer a pot of milk and sugar down to a thick goo, just go get a couple of cans of the stuff. Then collect the zest of at least a couple of lemons before you cut and juice them. And, you're going to need a few lemons – I made a double batch, and ended up needing six medium-large, very juicy lemons to make my pint-and-change of lemony syrup.


Tangy Lemon Cream Syrup 
Ingredients: 
1 cup sweetened condensed milk†
1/2 cup lemon juice, strained well
1 Tablespoon fresh very finely grated lemon zest


Directions:  
Stir ingredients together. Cover tightly, place in refrigerator at least an hour (best if allowed to stand overnight). 
Stir. Pour over cake, waffles, pancakes, or spoon. 
Top with whipped cream topping (optional)


Once the syrup was made, I sliced the cake in half crosswise, so I had two giant angel food doughnuts, and I slathered a very generous amount of the syrup between the layers (thicker toward the center hole), then restacked the cake, covered it with my Stabilized Whipped Cream frosting, and packed it to go to our feast.

As the cake was cut, each serving then received another generous drizzling of the tangy syrup, then was garnished with several curls of the candied lemon zest.
I will likely assemble this combination again, sometime soon. I suppose I could also pair it up with some fresh berries, instead of the candied zest (or alongside it. I am the sort to be greedy).


*If you don't have extra-fine sugar, you can make your own by running regular granulated sugar through the food processor for 3 to 5 minutes, until it's really fine. Don't take the lid off the processor until the dust settles, though.


† Because I have several projects coming due this next two weeks, I made several batches of sweetened condensed milk, including this one, using coconut milk.

Yum!


Sunday, March 15, 2015

How Waffle For You! GF Raised (Sourdough Yeast) Waffles

Waffles, sunshine. What more could a person want?
The Bat made waffles for us, tonight. And when I say "us", I am including our extended-family member, longtime friend Bill, while his wife is away for the day, at the opera. And, when I say "waffles", I mean those tender and crispy, slightly tangy treats with holes designed for maximum containment of melted butter and syrup in violation of all known sensible diets.

While many people hear "waffle" and think "so what?" or something even less polite, I've spent the past few years missing them terribly. Until now.
You see, The Bat has always made the classic Fannie Farmer raised (yeast) waffles, which take all day to prepare, and I'm not generally an early riser (unless you're one of the few who think the crack of noon is too early to pour oneself out of bed). This means that, in my version of the wee hours, as I continue to saw wood, she mixes up what is, essentially, a sourdough starter… using regular flour. The stuff from the wheat grain. The stuff which gives me migraines and other health issues.

So, normally, when she makes waffles, I get scrambled eggs. NTTATWWT*, but I missed those waffles, and watching Pop drown his in butter and syrup while I nibbled at an eggy fluff...well, I think there's something about it in the Geneva Conventions.

So, a little over a month ago, I planted a seed of an idea, that we could experiment with my many different Gluten-Free flours, and have a family feast on the experiment. After all, most batters using rice and/or bean flours are better if they're allowed to stand and steep in their juices a bit before cooking or baking, and they often give an even more certain crispness than the temperamental wheat varieties...so why not?

Then, last week, I took out of the freezer and left on the counter my most commonly-used flour mixture, my Bob's Red Mill GF AP flour, and waited.

This morning (well, midday, really) when I arose, she already had the starter going. (This is but one of the many reasons I love my mommy.)

Halfway through the afternoon, we could both see that the recipe needed a little tweaking.  She upped the amount of yeast to double, and I added some xanthan gum (it's not crucial, but it helps build the necessary bonds for a tender, porous core). In another hour, the starter was bubbling and ripening nicely.

By half an hour before supper time, the batter was perfect.

There was also a pound of bacon stretched across a rack on a baking pan in the oven, turning crispy. It was a nice, simple, Sunday supper.

One last bite or two, to sop up the remaining maple syrup. Waste not, want not…
I was in heaven.

Too bad for the dog, we aren't going to share with him.

Hope, soon to be dashed
I get the leftovers. BWAHAHAHAHAHAHA!


Raised (Sourdough Yeast) Waffles

Ingredients:

1/4 cup lukewarm water
4 1/2 teaspoons rapid rise yeast (or 2 packets)

2 cups lukewarm milk
1/2 cup melted butter
1 teaspoon salt
1 teaspoon sugar

2 cups GF all-purpose flour (you may need to add 1/8 teaspoon or so of xanthan gum, if your flour blend doesn't already have it)

2 eggs
pinch baking soda


Directions:

In a large mixing bowl, combine the water and yeast. Allow to stand 5 minutes, then add the milk, melted butter, salt and sugar.

Beat in the 2 cups flour. Cover, and let stand in a warm place 8 hours or overnight.

Prepare and heat the waffle iron.

Add in the 2 eggs and pinch of baking soda. Beat well. The batter will be very thin. Cook according to your waffle iron's directions.

Batter UP! (The ladle is navy surplus. The Bat really likes using it.)

Serve hot, with melted butter and your favorite syrup, fresh berries, or warmed jams/preserves (to make them more easily spreadable, and to avoid unnecessarily cooling the lovely, lovely hot, fresh waffles).

Serves 5-6.


The first little round one stuck to the iron, so it got kind of crumbled & bent. Tasted like a waffle, though, so, no complaints. 


*NTTATWWT:  Not That There's Any Thing Wrong With That