Raiding the larder of ideas.

What one family eats, plans to eat, dreams of eating. Plus, other food and kitchen-related stuff from the home of steak-and-potatoes, pie and fresh green beans from the garden.
Showing posts with label gluten-free. Show all posts

Friday, May 06, 2022

Flourless Whole-Citrus Cake


 I had a few blood oranges and a tangerine or two left over from another project I'd made a not long ago, & couldn't decide what to do with them, until I came across a series of recipes for whole-lemon and whole-orange cakes. Naturally, I had to try this, especially as I'm only 75% of the way through our birthday cake season.

Therefore, today is Flourless Whole-Blood-Orange (-and-Maybe-a-Tangerine-Because-Why-Not?) Cake week. 

It begins with a few thoroughly washed citrus fruits, a saucepan, and some water. 

It ends with dessert.


Flourless Whole-Citrus Cake

Ingredients:

Cake:
3 large lemons or medium oranges (or, as I did here, go for 3 small blood oranges and 1 small "Cutie" tangerine), divided (for optional icing)

3 Tablespoons Cointreau or other good orange liqueur 

6 large eggs, room temperature, separated

250 grams (approx. 1 1/4 cups) sugar

300 grams almond flour (finely-ground almond meal) 

2 teaspoons baking powder


Directions:

Thoroughly wash your citrus fruit, place in saucepan, and cover with cold water. Bring to a boil, drain, rinse, and cover again with cold water. Bring to boil again, then allow to continue boiling for 60 minutes. Drain, and allow to cool completely.

Cut fruit into quarters, remove seeds, place seedless fruit parts – peels and all – into food processor, and blend until smooth. Add Cointreau, mix in completely.  Reserve about 2 tablespoons for icing, if desired.

Line the bottom of a 9-inch springform pan with baking parchment paper (I usually give the parchment a quick spritz of water on each side so it's flexible and sets in place easily).

Preheat oven to 350º F. 

In medium mixer bowl, combine egg yolks and sugar, beating on medium until light and fluffy.  

In separate mixing bowl, whisk together almond flour and baking powder. Stir into egg yolk/sugar mixture along with 1 cup of fruit pulp. Set aside. 

Clean stand mixer's whisk attachment and bowl thoroughly to be sure they are oil-free (I recommend wiping down with vinegar-soaked paper towel) before placing egg whites in the bowl. Beat egg whites on medium until soft peaks form. Gently fold into the flour/pulp/sugar mixture.

Pour into prepared springform pan, smooth top, place on middle rack of oven, and bake at 350º F for 60 minutes* or until toothpick inserted in center comes out sticky but without crumbs.

Allow to cool completely, on cooling rack, before removing from springform pan. Top with icing (recipe below) or sprinkle with powdered sugar before serving.


 Icing (optional):

Ingredients: 

approximately 2 tablespoons citrus pulp (from above) plus 1 teaspoon Cointreau

juice of one small orange or two small tangerines, when combined with pulp, equalling 1/3 cup 

250 grams (about 2 cups) confectioners' – powdered – sugar † 

1 teaspoon butter, melted

Directions:

In a medium microwave-safe bowl, combine juice, pulp, and powdered sugar, whisking until smooth. 

Add in melted butter, whisk again until smooth and fluid (you can nuke it all for up to 30 seconds, if needed, but if you do, you'll need to allow it to cool a bit before the next step). 

Pour over top of cake. 

Serve or freeze within 2 days.


*If it looks as though the cake is getting too brown too soon, gently cover with foil for the last 5–10 minutes of baking.

†If you prefer a thinner or thicker icing, you can adjust the amount of sugar/liquid to your personal liking.


Further thoughts:
Having tasted the blood orange pulp

3 Blood oranges & 1 "Cutie" after boiling
& being run through the food processor,
with 3 TBS Cointreau yet to be added
(made about 1.2 cups total)

before I put it into the batter, I decided to give it a little extra subtlety by also using a portion of lemon sugar I'd had on hand since Christmas. It didn't change the weight, but if I'd been going for volume, the lemon sugar ended up taking up about 25-30% more room in a measuring cup, ounce for ounce – well, gram for gram, actually – than plain or ultrafine (caster) sugar. (I went with 200 grams sugar, 55 grams lemon sugar, just because.)

I'll have to try this with plain ol' lemons, sometime, or even Meyer lemons or straight-up tangeroonies, next time we get a big box of Cuties. Currently, all my fresh lemons are tied up in the making of a lemon meringue pie, though, so… blood oranges and tangeroonies it is. No complaints, though. Not. One.

Well, maybe one. 

Somebody doesn't like citrus

Thursday, January 14, 2021

Gone a Little Nutty: Honey-Sesame-Covered Cashews


 This past Christmas, The Bat received a 1-lb bag of delightful Trader Joe's cashew treats as a gift, from one of our extended family members. Within 48 hours of her having opened them, they had vanished. I got none of them. The Bat got some of them. Pop liked them. A. Lot.

Knowing how difficult it is to purchase said items locally (the nearest Trader Joe's is, IIRC, roughly 190 miles from our front door), I did a little research, and found a couple of recipes I could combine to make my own version. They're fairly simple, and not too sweet.

You'll need a 2-quart saucepan, a 1-gallon zipper bag, non-stick parchment or foil, and a jelly roll pan (sided sheet pan) at least 9x14 inches. You'll also need both the stovetop and the oven, plus a cooling rack.

The ingredients list is also simple.


Honey-Sesame-Covered Cashews

ingredients:

3/4 cup sesame seeds without hulls

2 teaspoons granulated sugar

pinch salt

2 cups unsalted cashews

1 Tablespoon honey

1 tablespoon unsalted butter


directions:

Preheat oven to 250º F

Combine sesame seeds, sugar, and salt in zipper bag, shake well. Fold opening down to make a wide, stable opening. Set aside.

Line your jelly roll pan with non-stick parchment or nonstick foil. Spread your cashews out on it, and place on center rack of warm oven.

On medium-high heat, melt butter and honey together, and bring to a boil for 2 minutes, stirring constantly. Remove from heat. Moving quickly, remove cashews from oven, add to honey/butter mix in pan, stir until completely covered. Pour hot-ish mixture into bag of sesame seeds. Seal bag and shake gently but well, aiming for maximum coverage.

Pour contents back onto lined jelly roll pan, spreading it out so very few – if any – pieces are touching. Return to oven, bake for 10 to 12 minutes.

Allow to cool completely, in pan on rack, before handling them. 

Store in an airtight container.* 


*I'm led to believe these will last for several weeks in a decent container, but my evidence indicates they evaporate into thin air fairly swiftly.

Thursday, March 09, 2017

Praline and Butter Pecan Pound Cake (an experiment) (gluten free)

Ring of No Regrets
In case you hadn't figured this out, I love having the opportunity to bake birthday cakes. Twice a year, I get to design and build something more for show, because the feasting will be done, in the majority, by youthful philistines... that is, the party guests of my favorite house monkeys. ;) And so, I have created rough sculptures from flour, sugar, and butter.

This weekend is another birthday, though, for an adult in the family. No sculpture necessary. It just has to be tasty as heck and not look as though a train ran it over and it caused a derailment.

Therefore, I have the freedom to explore a variety of flavors, textures, and extra ingredients, all of which I hope will please the palates of the family. And I may have hit on one. Well, at least if the rest of the crowd isn't impressed, The Bat and I will have some extremely decadent treats.

Because…pecans and butter. What's not to love?


You know you want some of that butter and pecan bliss…

My inspiration was a recipe I found in my mailbox, but I had to adapt it to remove the wheat, and…well, once you mess with flour in a cake, there's a huge risk you're going to end up with something completely different from the original plan. I realize there are some very good gluten-free 1:1 all-purpose flours on the market (I generally use Pamela's™because it's reliable & reasonably priced), but when your recipe is in volume rather than weight, textures can vary. Also, I was interested in finding out whether a cake with nut meal in its base was everything the GF sites said it was.

It is.

Seriously, even if this had come out nothing but crumbs, I'd have spent an hour licking the last crumbs off the countertop.

Try it for yourself.


I made this one using a mix of pecans, brown sugar, and butter in the bottom of the pan. The sugar hardened, & needed help coming out of the pan (hence, the crumbly lines at what would have been the ridges), but it tasted like the Elyssian Fields...And WAY too sweet for most of the family.

Praline and Butter Pecan Pound Cake (gluten free)

Ingredients:

2 cups pecan pieces
3/4 pound unsalted butter (3 sticks) plus 2 tablespoons, divided
2 1/4 cups granulated sugar (plus more for pan)
3/4 cup light brown sugar, firmly packed
6 large eggs
1 1/2 cups almond flour (almond meal)
1 1/2 cups gluten-free 1:1 all-purpose flour
1 teaspoon kosher salt
1 1/2 teaspoon gluten-free baking powder
1/2 teaspoon baking powder
1 Tablsepoon pure vanilla extract
1 cup buttermilk
1/2 cup pralines (or simple pecan halves) (optional)

 Directions:

Set out all refrigerated ingredients at least 1/2 hour ahead of time, so that everything you work with is at room temperature.

Finely chop 2 cups of pecans (I use a tool designed expressly for the purpose). In a large frying pan, melt 2 Tablespoons butter, add in chopped pecans. Stir until butter covers the pieces completely, continue to stir until they're lightly browned (about 5-8 minutes). Remove from heat, set aside to cool.

Preheat oven to 325º F (approx 165º C).

Completely coat the inside of your non-stick baking pan with non-stick spray, then "dust" it with a coating of granulated sugar (I used a bundt pan, but you might want to pull out your large tube pan). Arrange 1/2 cup pecan halves facing downward on the bottom of pan.

In a small mixing bowl, whisk together granulated & brown sugars until evenly combined. Set aside.

Into a medium mixing bowl, sift together almond flour, all-purpose flour, salt, baking powder, and baking soda.

Using your stand mixer bowl with paddle (or a heavy-duty hand mixer, if you don't have a solid stand mixer) at low speed, mix together sugar and butter until just combined, add eggs and mix only until the yolks are broken.

With mixer continuing at low speed, begin adding in the dry ingredients a few tablespoons at a time until all combined.

Add in vanilla, mix in completely.

Add chopped pecans, stir by hand, if necessary.

Scoop batter into cake pan carefully, so as to avoid disturbing your layer of pecans.

Bake 75 minutes, or until toothpick inserted in center of cake comes out clean.

Remove from oven, allow to cool completely.
(If the cake sticks to the pan at this point, warm it a few minutes in the oven, to soften the sugar in the crust enough for it to release from the pan.)

Serve in small slices, perhaps with unsweetened whipped cream or with ice cream.

Wednesday, November 02, 2016

Banananana… You won't know when to stop with this nut bread

Over the course of time, most of my old cravings for forbidden (trigger-laden) foods have disappeared. For example, I no longer pine for strawberries every time The Bat brings home a quart of fresh ones for herself and Pop. Grapes come in and go out without my feeling the desire to pope one in my mouth and stop breathing… but breads are a much harder habit to break. 

Worse still, I have desperately missed dessert-y quick breads, like the classic banana-nut loaf which usually happened at least once a month when I was younger – after my brugly other stopped inhaling the fruits, and the occasional banana was allowed to go a little overripe. During those years, The Bat would take out the extra-long loaf pan (the 5x16 incher) and load it up with batter, filling the house with that sweet, heady aroma. If we were lucky, there would also be a brick of cream cheese on the counter when the bread was finished baking, to add a little bite, a little extra richness to the treat. But once wheat was put on my list of things to be avoided, I would glance longingly at those fruits on the counter as they started to show brown spots.

No more, though!  I can have my cake, and eat it, too. 

Welllll… technically, no. I can have my banana bread, though, and make it lower in carbs at the same time I make it wheat-free. This makes it slightly more virtuous a feast, until I slather that cream cheese all over it and treat it as if it were cupcake frosting.

Granted, it's a fairly heavy version of banana bread – Pop likes his to be a little more on the lightly cakey side, whereas this comes out dense, like a pound cake. Still, it's banana-y, nutty, and moist. What's not to like? 


Rich, nutty, fruity, and good for you…like a bran muffin, only without the whole bran muffin attitude 


Banana Bread with Coconut Flour
Ingredients:
7 large eggs at room temperature
3 Tablespoons honey
1/2 cup coconut oil or butter, melted
1 cup mashed ripe bananas
1 cup sifted coconut flour
1/4 teaspoon salt
2 teaspoons baking powder
1/4 teaspoon baking soda
1/2 cup chopped pecans (optional)

Directions:
Preheat oven to 350° F.

Grease a standard glass loaf pan.

In a large bowl, and with Paddle attachment (not dough hook or whisk) combine eggs, honey, oil, and mashed bananas, beat until well blended.

In a separate bowl, sift together coconut flour, salt, baking powder and soda. Whisk in nuts, if you are including them. 

Gradually add the dry ingredients to the wet, in the mixer bowl. Mix until completely combined.
Pour into greased loaf pan, place on middle rack of oven. Bake 1 hour. 

Remove from oven, allow to cool 10 minutes in pan.  

Remove from pan,  allow to cool completely on rack.

This bread is better if allowed to stand overnight. Serve with cream cheese brought to room temperature to soften, for greater cake-like awesomeness.

Wednesday, April 06, 2016

Lemon Meringue Bites (gluten-free)

I split this one with Pop before dinner. It didn't spoil our appetites at all.

This time of year is the big birthday season, in our family (we have a LOT of Aries' babies, if you're into astrology). As such, the first thing on the agenda is always the birthday cake (for which I have already produced a couple, and will have another constructed, this coming Saturday) …or, in Pop's case, as you may recall, the birthday pie.

I used to enjoy the Bat's divine lemon meringue pie, myself. And then I found out I had that little problem with wheat. So Pop's favorite dessert – and mine – was no longer on my menu. Seriously. Even with the many varieties of GF flours on the market, it just didn't work, because one of us would be left unhappy.

Or so I thought.

This week, I stumbled across a recipe for gluten-free lemon squares in a King Arthur Flour's email, and realized that I could very easily adapt the nut flour shortbread crust to our "ancient family secret" pie recipe. And, since this was an experiment, and I really can't eat a whole pie by myself, I had to spend some time re-figuring the structure and time on this project.

As luck would have it, our kitchen is stocked with several different types of baking pans, among them a mini-cheesecake tin I bought for myself a couple of years ago and had thus far only used for brownie bites. It really makes removing treats from those little wells so easy!

A few things for me to consider, the next time I make these (and I will be doing so fairly frequently, now) :

1. The wells in the mini-cheesecake tin are a little over 4 centimeters deep, and this dough, while tender, is fairly sturdy. I could make the reservoir in the cookie even deeper than I did (they ended up being halfway up, or roughly 2 cm). I like the flavor of the cookie, though, and, with a strong citrus curd, it's not a bad idea to keep it almost effectively a "thumbprint tart". If I do decide to press them to accommodate more curd, I'll break out the wooden tart/tassies press instead of letting my thumbnails interfere in the process. That way, I'll easily produce 12 tartlets, instead of the nine I got this time.

2. In making the meringue, I'll add about 1/4 teaspoon lemon juice, and a little zest, too. I accidentally spilled at least a full teaspoon of juice into my egg whites (Captain Coordination strikes again!), and, rather than waste them, I gave it a whirl. The meringue tasted amazing, but, unsurprisingly, fell almost immediately after it came out of the oven, becoming gooier and a spot tougher. However, I've used a small amount of citrus juice before, in making meringue cookies, and, for three egg whites, a hint (1/4 tsp, added in near the end of beating the egg whites & before adding the sugar) is all I need as a substitute for the cream of tartar (to which I am very allergic).

3. Use a wire cheese cutter to slice butter into half-centimeter cubes before tossing them into the freezer for a really good chill.

4. It is possible to make these little bite-sized treats using only the mini-cheesecake pan, but I found that the cookie cups held up very nicely outside the pan, and took on a more attractive hue when browning the meringue. Plus, it's easier to hand-clean the pan elements if there's no meringue baked on.

5. Always make more lemon curd than you think you're going to need. Not that you'll actually need it, but who doesn't want a little custard cup of lemony heaven once in a while?

That pretty curd is Meyer lemon, this time.

Here is the recipe, as I attempted to work it today:


Lemon Meringue Bites (gluten-free)

Ingredients: 

cookie shell:
6 Tablespoons butter, diced and hard-chilled
2 cups blanched almond flour (or fine-ground almond meal)
6 Tablespoons sugar
3 Tablespoons corn starch
1/4 teaspoon salt
finely grated zest of 1 small lemon

filling: 
3 egg yolks
3/4 cup sugar
grated zest of 1 small lemon
1/3 cup lemon juice
2 Tablespoons butter
2 Tablespoons corn starch
pinch salt
1 1/4 cups boiling water


meringue:

3 egg whites
6 Tablespoons sugar
zest of 1 small lemon
pinch salt


Directions:

Preheat oven to 350º F.

Lightly butter the wells of your baking tin.

Make the shortbread cookie shells: In a small mixing bowl, whisk together all the ingredients for the cookie shell except the butter. When your dry ingredients are thoroughly mixed, add in the mostly-frozen butter cubes and work into dough using a pastry blender or your fingers. Don't overwork it, but be sure that there are no large clumps of butter in the mixture. It will resemble coarse, moist sand when it is ready.

Fill each cup in the baking tin with the loose mixture, then proceed to press it against the sides and bottom of the cup (yay! building sand castles in the kitchen!).

Place in oven, bake for 15-20 minutes, or until golden brown.

Remove from oven, allow to cool completely in the pan on a cooling rack.

When the cups are cooled, remove them carefully from the pan, place on a cookie sheet or another baking dish.

While the cookies are cooling, make the filling and the meringue.


Make the lemon curd: Prepare a double boiler (or, if you don't have one, improvise one by resting a heat-proof bowl over a saucepan with about an inch of room for the water beneath it). In a medium mixing bowl, beat egg yolks thoroughly by hand. Add in all other ingredients except the water. Mix completely.

Add in the boiling water, pour the mixture into the top of the double boiler, and stir over simmering water until it begins to thicken. Allow to cook another 10 minutes, until completely thick.

Fill each cookie cup with curd. If there is any left over, pour (or scoop, as the case may be) into a custard cup, and save that for later misconduct.


Prepare the meringue: If you were energy-conscious and turned your oven off while the cookies were cooling, re-heat the oven to 350º F.

In a small mixing bowl which has been cleaned thoroughly to make sure there is no residual oil in it, beat egg whites on medium speed until soft peaks begin to form. Add in lemon juice while the mixer is still running, then gradually add in the sugar. When the eggs become glossy and medium-soft peaks can be formed, fold in the lemon zest. At this point, you can scoop the meringue into a pastry bag and form pretty designs on top of your cups, or you can go random with a spoon, the way I prefer.
Meringue in dollops. Lots of dollops.


Waste not, want not. Leftover lemon curd is fine alone, or with a pretty leftover meringue topping.

Bake at 350º F for 15 minutes, or until golden-browned.

Remove from oven, allow to cool completely (cover & chill overnight if you think you can leave them alone that long).


Ain't misbehavin'. Savin' my curd for lunch.


Sorry about the color. Kitchen table lighting doesn't do the warm golden meringue tips justice, especially on a green dish. But it was what was at hand as the crowd started arriving.

Sunday, January 24, 2016

Not A Bad Way To Loaf: Coconut Flour Bread

Under normal circumstances, some things don't really go together. For example, I had a great honkin' canister of coconut flour on my counter, and a deep and abiding need for a slice of bread and butter. Generally, when I say I want bread and butter, it means I crave a slice of yeasty perfection – something I had thought I needed to give up when I cut wheat out of my diet a couple of years back. The dry-ish coconut flour was nowhere in the vicinity of meeting that need.

After all, the best bread in the world involves ooey, gooey stretchy gluten, right?

I really have tried a number of different blends of flours, and pretty much all the mixes on the market for baking a sandwich loaf, and, while they are (most of them) quite sufficiently tasty and firm for making a BLT, toasted or not, none of the ones I tried held my interest when treated to a coating of plain, simple butter. They just didn't measure up to Great-Aunt Helen's fresh farm-baked bread at the forefront of my memories. Well, that should come as no surprise. Helen's bread had the magical element of love. But that's beside the point. Her clean, simple recipe is pretty much impossible to imitate without the exact same ingredients. And I shouldn't have been trying.

I needed a small slab of something above and beyond merely "acceptable", upon which to spread my butter.  So I gave up on the not-so-cheap copies, and went back to the search. I found this recipe.

In my 1.5 quart pyrex loaf pan, the batter was dwarfed, producing a loaf approximately 1 inch high at the center of the rise. While that's not a terrible shape for biscotti, either I was going to have to go buy a new, smaller loaf pan, or I was going to have to adjust the recipe upward to make a loaf, not a rectangular pancake.

My budget helped me decide, so I opted for the latter.

Besides, I was expecting company for dinner at the end of the week, so, why not make enough to share (if I absolutely have to)?

It took a couple of tries to get it right, though, (my first large loaf was underdone in the center) so I'm glad I didn't wait until the last minute to learn.

What I ended up with was still not a great domed loaf of fluffy, puffy, yeasty, crusty farm bread, but it holds its moisture, and it holds a nice layer of butter…plus, it uses some of that great honkin' canister of coconut flour I wasn't sure I'd ever find good use for.*

And it tastes pretty good with a couple of slices of bacon, some lettuce, and a slice of vine-ripened tomato. Hold the mayo.


Coconut Flour Bread (large-ish loaf)

Ingredients:

110 grams (1 cup sifted) coconut flour
1 1/4 teaspoons baking powder
8 large eggs
3 Tablespoons honey
1/2 cup (1 stick) unsalted butter, melted
1/4 cup coconut oil, melted
3/4 teaspoon salt


Directions:

With rack in middle of the oven, preheat to 325º F.

Grease loaf pan (I like to use real butter for this, but you can use the spray stuff, if you absolutely must).

In a small bowl, sift together coconut flour and baking powder. Set aside.

Using the paddle attachment (not the dough hook) for your stand mixer, combine eggs, honey, butter, coconut oil, and salt. (If you don't have a stand mixer, just use regular beaters of your hand-held mixer.)

When they are thoroughly mixed, gradually add in the dry ingredients and mix well. Your dough should look a lot like thick cornbread batter.


Spread dough in the loaf pan, smoothing top with lightly moistened spatula or lightly wetted fingers. Place in center of oven, bake 60-70 minutes, until top has begun to brown.

Remove from oven and from baking pan, allow to cool completely on rack.


*This is to regular yeast bread what pound cake is to angel food cake: greater density, but still a tasty option.

Wednesday, December 30, 2015

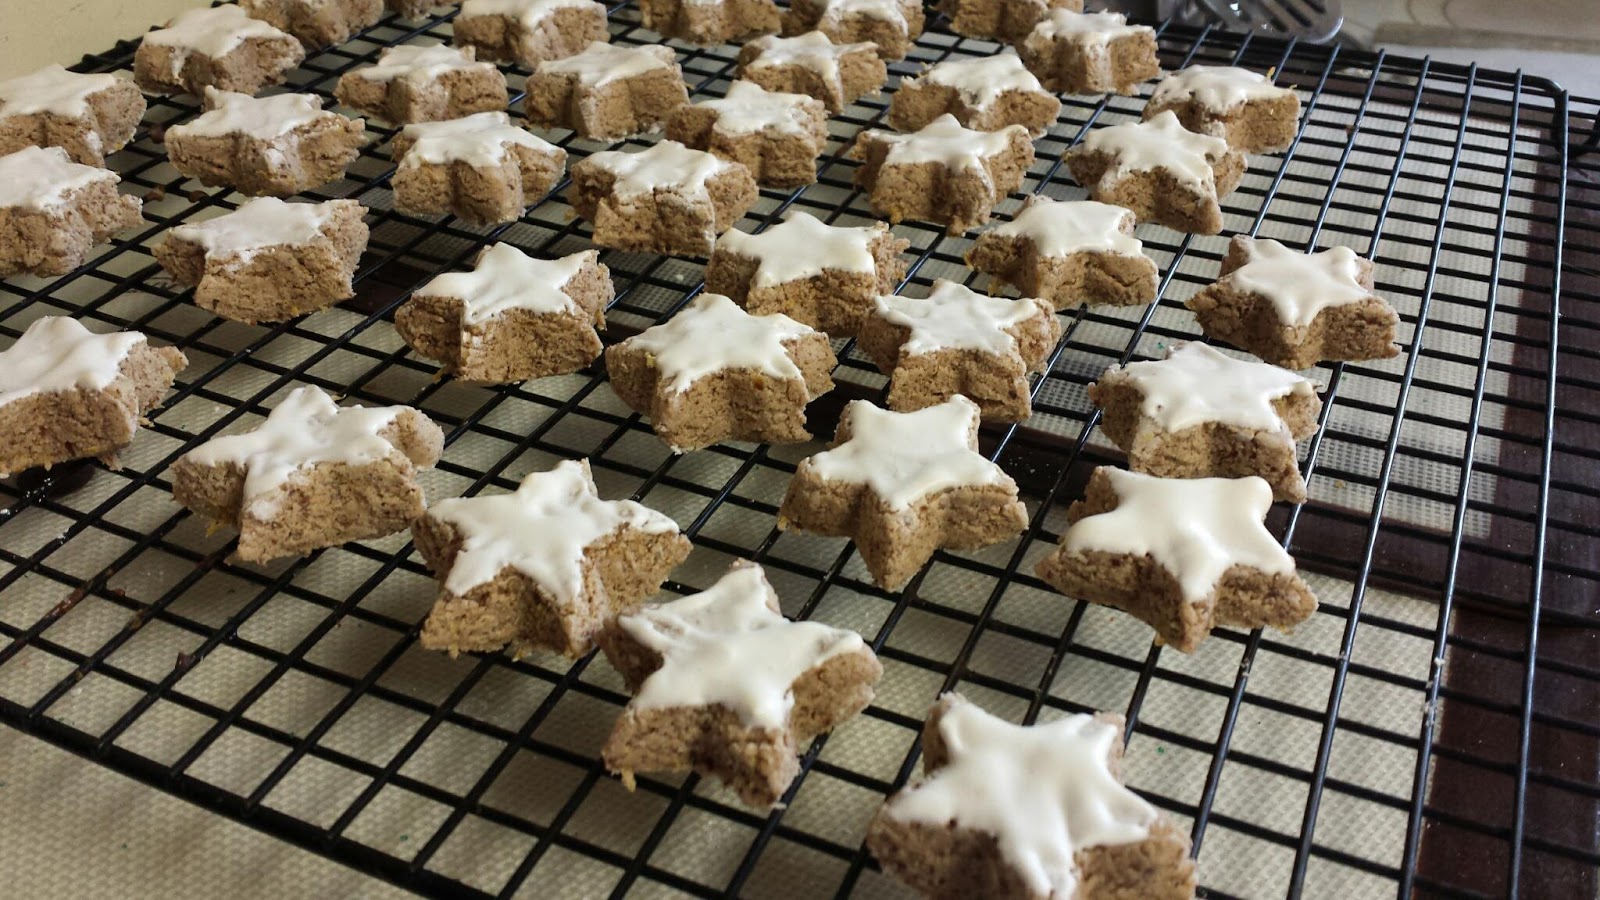
Cinnamon Christmas Stars, aka Zimtsterne

This is one of those recipes which is not outrageously expensive, and yet is outrageously tasty and outrageously easy to make – the latter especially so, if you have a young'un or two around the house who happen to be willing to help out with the cutting and slathering with icing. But even without my having assistance of Ilex, 


this Christmas treat is one I'll be making regularly…possibly even outside the holiday season. It's that good. Plus, it's gluten-free by its original design, so there is that, as well. I don't have to worry about remembering to adapt my freezer-full of flours to meet the current needs.

I do recommend bringing out your most accurate kitchen scales before you get started, too. Not only is it what the original recipe called for, but I find that – as professional bakers have assured me – dry ingredients may vary wildly in their density from one milling to the next, so one cup of something one day may be 10% heavier than the next day, so you'll have less predictable results.

However, I will need to study further, to see if they can be made with alternative sweeteners, for my other friends who are on low- or no-sugar-added diets. But, as a certain non-German woman once said, "I'll think about that tomorrow." I'll finish eating giving away these, first.

Heh.

Meanwhile, here's what we have: starting with this recipe, and adapting slightly to our kitchen. 

Zimtsterne (Cinnamon Stars)

Ingredients:
3 egg whites
250 grams powdered sugar
360 grams finely ground almonds or almond flour (I used non-blanched for this batch)
2 1/2 tsp cinnamon
Fresh, finely-grated zest of 2 small lemons (about 2 Tablespoons)
Pinch of salt

Directions:
Make sure your mixer bowl and whisk attachment are completely clean and free from any oils before you start. (I recommend washing, drying, and then taking a paper towel or cloth moistened with cider vinegar to wipe it clean again, to be doubly sure.)

In that bowl of your stand mixer, using the whisk attachment, beat egg whites until they become foamy.

Begin adding the powdered sugar in small batches (a few tablespoons at a time) while the mixer is running. Beat on high until the meringue is very shiny, but before very stiff peaks form. This may take ten minutes or more, so be patient.

Remove 50 g of the meringue (about 1/3 – 1/2 cup) to a small bowl, cover and refrigerate.

Next, in a medium bowl, whisk together the ground almonds (or almond flour), cinnamon, lemon zest and salt. 

Fold dry ingredients into the remaining meringue mixture until just evenly distributed, and no more. (If it feels really thick and dense, don't worry. This recipe bakes up light, almost airy cookies, despite its feeling like you're stirring nearly-hardened concrete.)

Tip the contents out onto a large sheet of parchment paper sprinkled with powdered sugar. Sprinkle the top of the mixture with some more powdered sugar and top with another sheet of parchment paper. Roll out the dough to just under 1 centimeter thick. Refrigerate 1/2 hour to an 1 hour, to help firm up dough and reduce its stickiness.

Once sufficiently chilled, remove from refrigerator, peel off the top sheet of parchment and sprinkle again with a bit of powdered sugar.  Coat your star cookie cutter with nonstick spray and wipe excess away. Then, dipping your cutter into powdered sugar each time, cut out the stars and place fairly close together on a parchment-covered cookie sheet (they don't expand very much). Continue to collect the dough into a bowl and roll out until all is used up.

Preheat the oven to 300° F., or 150º C.

Using an offset spatula or a knife (I use a tapered icing spatula, for more precise application on the star points)  spread the remaining meringue mixture evenly across all stars, making sure it doesn’t drip down the sides. Place in oven and bake for 8-10 minutes. Keep an eye on them --  you don't want the meringue to brown, just cook and crisp up a little.

Let cool on the cookie sheet for 5 minutes and then transfer to a cooling rack. Allow to completely cool. Store in an airtight container for up to a few weeks.

Makes about 50-75 6cm (roughly 2 inch) 2-bite stars. Larger cookie cutters will, obviously, make fewer cookies, and be slightly less challenging to get unstuck from the pointy parts of the cutter. 


Update: I've given a try to substituting an artificial sweetener for another batch (1 cup Splenda instead of the sugar). The flavor is as good, and the cookies are as tender as the regular ones (if a wee tad drier on the tongue), but it seems that the Splenda-based meringue topping, when left to sit in the refrigerator for a while, tends to curdle. This may mean I over-beat the eggs (easy enough to do when you're whipping eggs without sugar), but I think I'd like to give a try to separating out one egg white in advance – or measure out prepackaged egg white – and whipping that up with sweetener, only after I've allowed the dough to chill, and I'm ready to cut the stars.
They're not as pretty as the real sugar version, but I'll have no qualms about noshing on them, or sharing with others…if I have to.

Monday, August 24, 2015

So I Bake with a Sody-Pop, or, A Simple Cake Made Somewhat Complicated

I decided to run an experiment, today. For the past couple of years, the thing that's been all over the internet is the cake made from one box of cake mix and one can of pop (soda, to you on the coasts, and for my friends & family south of the Mason-Dixon, whatever flavor of Coke you have).

Well, I have gluten-free cake mixes, and they require a slightly different treatment from the regular mixes: where the usual Duncan Hines and such call for water, oil and eggs, the Aldi yellow cake mix ups the ante and calls for milk instead of the water.  And, so, to the powdered milk box I went, and added 1/3 cup of dry Carnation brand. Plus, I put in some powdered egg equivalent to three actual eggs sans liquid, two tablespoons of butter powder, and a trace of cinnamon. Because.

My choice for pop was one which, around here, is only occasionally to be found at the Big Lots stores, and I like drinking it so much I was reluctant to risk it in such a manner, but, nothing ventured...

And, of course, I couldn't leave well enough alone, so I plumped and tenderized some dried cranberries in hot water (okay, I plunked them into water and nuked them for 90 seconds, until they started to boil), then drained them and tossed them in brown sugar and cinnamon, to be strewn throughout and more on top.

Sometimes I could probably use a supervisor to tell me when I'm making things unnecessarily complicated, especially as involves the brainless cake. After all, the point of this was supposed to be to see if I could make a tasty cake with just a box of gluten free mix and a bottle of pop. 


But I think I can safely say that it is possible. Just not by me.


Simple cake made complicated (sort of)

Ingredients:

1 box gluten-free yellow cake mix
1 (12-ounce) bottle of your zippiest ginger brew or ginger ale
1/3 cup powdered milk
6 Tablespoons powdered egg
2 Tablespoons powdered butter
3 teaspoons cinnamon, separated
1/2 cup dried cranberries, plumped in hot water and then drained
2 Tablespoons brown sugar or brown sugar substitute, plus a little more for decoration

Directions:

With the rack in the center of the oven, preheat oven to 350º F.

Grease the bottom of an 8"x8" cake pan, then line bottom of pan with parchment, and lightly grease that (you can trim off the flaps, if you want, but I like to leave them there, to help with removing cake from pan later on, as well as removing parchment from cake).

In a medium mixing bowl, whisk or sift together all the dry ingredients except the brown sugar and 2 teaspoons cinnamon, until they are completely mixed.

In a small bowl, mix together the cranberries, brown sugar, and remaining 2 teaspoons cinnamon.

Fold in the soda pop with a rubber (or silicone) mixing spatula.

Pour half the batter into the pan. Sprinkle about 1/3 of the cranberry mixture across the surface, then pour the remaining cake batter over that, and sprinkle the rest of the cranberry mixture on top. If desired, top with a light sprinkling of more brown sugar, to create a sparkly crust (it gets a little bit that way on its own – it's the nature of this mix already to be faintly crisp-topped).

Bake at 350º F for 41-45 minutes, or, until a cake tester inserted in the center comes out clean.

Allow to cool completely in pan on cooling rack.

Serve with cinnamon/ginger whipped cream or a small scoop of ice cream and some cinnamon sugar.

Tuesday, July 21, 2015

I Scream...Well, You Know the Rhyme

Yesterday morning, just as she was getting ready to fix herself some lunch, and I was considering finishing that last 40 winks, The Bat got a call inviting us to sup with the extended family. When asked what we could contribute to the meal, the subject of dessert came up.

They like it when I bake.

Go figure.

Well, this time, I'd been seeing all my friends on social media sharing the simplest process for making ice cream without a churn. It promises that any idiot can make awesome stuff with only three ingredients, a mixer, and some room in your freezer.

And it's true. You can make a lovely, tasty ice cream with a pint of whipping cream, a 14-ounce can of sweetened condensed milk, and your flavor of choice. Some people go chocolate, some vanilla, some even go all coffee-crazy. The recipe adapts to your tastes.

What it doesn't necessarily do is make something lighter than a brick, once it's been in the freezer a few hours. Unless you disregard the instructions everybody gives you, where they say, "just dump everything into your mixer's bowl and whip it all light and fluffy like unicorn toots."

Okay, I added the simile. There are no unicorns mentioned in their promises.
But promises of fluffy, creamy dessert fall short, too. Dumping a can of sweetened, condensed milk into a bowl with a pint of whipping  cream is likely to make a sort of a sweet fatty goo. I know. I did it. No matter how long you beat this stuff, if you don't prep, you get uncooperative dairy products.

So, prep. Prep. Prep.

To make ice cream sandwiches using a variation on my favorite chocolate cake recipe, you'll need three (3) 12 inch by 17 inch jelly roll pans (also known as sided half sheet pans). I am specific about the size, because the cake batter will be stretched too thin by the 13 x 18 inch pan.

Line one cookie pan with plastic wrap and place in center of deep freezer, along with large mixing bowl and whisk attachment or beaters.

You will also need to refrigerate the whipping cream and sweetened condensed milk. Seriously. Put those cans in the fridge at least an hour before you start making the recipe.

While the dairy chills, take out your eggs for making the cake. The recipe calls for a full dozen egg yolks and ten egg whites, and I have all the grace of a circus bear, so, invariably I will let some yolk break while separating at least one egg for the meringue base to the sponge cake, so I bring 14 eggs out. If you feel brave, confident, reckless, stick to a dozen. But if you're like me, plan for the worst-case scenario.

All right. The dairy is chilled, the bowl and beaters are effing cold,  and you are ready to start.

Ice cream sammiches

Ingredients for ice cream:
1 pint (4 cups) whipping (or heavy) cream
2 cans (14 oz each) sweetened, condensed milk
1 Tablespoon orange liqueur (optional)
1 teaspoon vanilla 

Directions for ice cream:

In deeply chilled mixing bowl, pour whipping cream. On medium speed with chilled beaters or whisk attachment, beat cream until light and fluffy, about 4 - 5 minutes.

Add in orange liqueur, continuing to beat until mixed in.

With mixer still running on medium, gradually stream in the condensed milk until completely combined.

Quickly transfer to the half pan you've had waiting, lined with plastic, in the freezer. Cover with another sheet of plastic wrap, and allow to chill at least three hours, until firm.

And, now, the cake.

Cake ingredients:

12 eggs, separated
3/4 cup granulated sugar
3/4 cup extra fine granulated (bartender's) sugar (may use regular granulated)
1 cup plus 2 Tablespoons extra dark cocoa powder
3 Tablespoons orange liqueur like Grand Marnier
1 teaspoon vanilla 

Cake directions:

While the ice cream is chilling out, put the oven racks near center, and preheat your oven to 375° F. Line your remaining two jelly roll pans with parchment and grease the parchment well.

In a large mixing bowl with whisk attachment set to high speed, beat the egg yolks with 3/4 cup granulated sugar until light and fluffy, about 5 minutes. add the orange liqueur and vanilla, mix in completely, then lower the speed of the mixer to slow, and add in the cocoa powder. Mix completely, then transfer to a medium bowl and set aside for the moment. (I cheat. I have two stand mixers, so I do both yolks and whites at the same time. It knocks about 10 minutes off the prep time, is all.)

Thoroughly clean and dry the large mixing bowl and whisk attachment, then wipe thoroughly with paper towel dampened in vinegar. Whip the dozen egg whites until they begin to become foamy, then, with mixer running on medium, add a slow stream of sugar until fully mixed in. 

Continue to beat until firm peaks form.

Once you have made the batter, divide it evenly between the two pans, bake about 15 minutes, or until it springs back from a light touch near the center (this is one time when slightly over-baking a sponge cake is not a crime).

Allow to cool completely in pans on cooling racks, then turn out onto fresh parchment on a flat cookie sheet or cooling rack. This cake will settle considerably in the center. If you want to make the edges even all the way around the ice cream bars, you can trim the bulbous edges away using kitchen shears (knives will likely leave a rough, torn-looking edge). (Personally, I like the extra cake with my ice cream.)

Place in deepfreeze until ice cream is completely set up and cake is slightly frozen.

Stack layers*, cut with large knife (you may want to dip the knife in warm water and then wipe clean between each slice), serve immediately, or wrap individual portions in plastic or parchment, and freeze for up to 5 weeks.


*When I was assembling my sandwiches, it was hot enough that the ice cream would have melted and squished out the sides when trying to cut through the frozen top layer of cake, so I pre-cut the top cake into 3-inch squares using a very large knife. Then I brought out the ice cream, removed the top sheet of plastic, and flipped the thing out onto the top of the bottom cake layer, removed the other sheet of plastic, then recruited The Bat to help adjust the thing, and quickly arrange the cake "tiles" on top of the ice cream layer before slicing the rest of the assemblage between those cake "tiles".
Dessert of Champions

Back into the freezer it went until just before I was ready to finish with the cutting into squares, transport (in Tupperware cookie boxes lined with parchment, buried in bags of ice, in our trusty monster cooler) and serve.

Saturday, July 11, 2015

Snowflakes In July

There was this lemonade....

They look naughty, don't they? They probably are…but who cares?

Well, really, there was this can of frozen lemonade concentrate. It sat in the back of the freezer, calling out my name. But the weather has been surprisingly cool, for July, so I haven't felt justified in taking up space in the refrigerator with a half-gallon jug of a beverage we'd all just sip at for the next week, so I needed another excuse.

Plus, I hadn't tried anything new in the kitchen since the old fogeys got back from their early summer gadabout, almost two weeks ago.

Needless to say, I needed to bake some lemonade. It was as simple as that.
I found this recipe, not too long ago, and it cried out for a little gluten-free treatment.

The recipe refers to them as moist, and I will give them that, but in using gluten-free flour, no matter what you do, the nature of the cookie is likely to change slightly. There is probably a way to make them gooey and gluten-free at the same time, but today was not the day to spend an extra six hours and five bags of flour trying to find it. We had family coming for supper, and I didn't need to have the kitchen in chaos right before they arrived.

I worked with Pamela's All-Purpose Artisan Blend (bought via the famous largest internet retailer), this time, and it created lovely, tender treats which melted in my mouth. As I work things out, I find I like their flour almost as much as I like King Arthur's Gluten Free…actually, I think I like it more because I don't have to add xanthan gum to make it hold together the way a regular wheat-based flour will. It's already in Pamela's blend. 

Also, slightly less money.

At any rate, these were a lovely, light dessert for the crowd.

Seriously.

Like snowflakes. In July.

They look like dirty little snowballs, but melt like snowflakes. 


Lemonade Snowflakes

Ingredients:

For the cookies:
1 cup butter, softened
1 cup sugar
2 large eggs
3 cups gluten-free all-purpose flour
1 teaspoon baking soda
1/3 cup frozen lemonade concentrate, thawed and strained
Fresh zest of one lemon, finely grated (optional)

For the glaze: 
1/2 cup frozen lemonade concentrate, thawed
fresh zest of 1/2 lemon, finely grated (optional)
sugar for dusting (you can use powdered, colored, or other decorative sugar if you like. I just enjoy the look of frost on the cookie tops, with the plain granulated sugar)


Directions:

Arrange oven racks near center  of oven.

Preheat oven to 400º F

In a medium or large mixing bowl, cream the butter and sugar until light and fluffy.

Add in eggs, one at a time, beating well after each addition.

In a separate bowl, whisk together the flour and soda.

With mixer at low speed, alternate adding in the flour mixture and the lemonade concentrate, until it is all completely mixed together. You may need to stop the mixer and scrape down the sides of the bowl a couple of times in the process.

Scoop by approximate teaspoonfuls onto an ungreased baking sheet. (I used a #60 portioner – a 2 tsp scoop. If you do the same, be prepared with a bowl of hot water to dip it occasionally, to help the dough release. It will not adversely affect the flavor or texture of the GF cookies.)

Bake for 8 minutes. 

While the cookies are baking, arrange parchment, foil, or other "dribble-catcher" layer beneath your cooling racks.

Remove cookies from oven. Using spatula, transfer cookies from baking sheets to cooling rack.

While they are still warm, brush cookies generously with remaining lemonade concentrate, then dust with sugar. 

May be served warm, or refrigerated for maximum summer lemonade chill effect.

Makes about 70 bite-sized cookies.


I can't imagine who stole that cookie from the back row…she said all innocently.

Friday, May 01, 2015

The Perfect Meal Cookie : The Oatmeal Standard

I learned too late to do anything about it, that yesterday was National Oatmeal Cookie Day.

Only lightly speckled with dried cranberries… but plenty of pecan chunks.

Imagine the heartbreak in our house, to have missed the opportunity this year to honor such a great food! After all, it is the perfect meal, if you want it to be…egg & nut protein, fiber from the oats and the fruit, and, of course, outrageously edible…if one wanted to, one could even give it real muscle by adding bacon crumbles. Or, you can leave it alone as a tasty dessert treat. Which my family prefers. Even when we miss the holiday. As we did yesterday.

Well, rather than allow this tragedy to go  unaddressed, today I decided to simply pretend it was still yesterday. I asked The Bat for her old stand-by recipe (a battered photocopy of an Ann Pillsbury recipe published at least as long ago as the first year my folks were married, more than a half century ago), and got to work.

Along with the plan of baking a heap of treats, I also gave a test to my most recent gluten-free flour purchase. I'd already tried Bob's Red Mill 1:1 GF, and it was good, but I like to be thorough. And I'm rather glad I was.

I like the texture and taste even of the dough made using the Pamela's flour, and the cookies…most assuredly a repeatable experiment. The one issue I had was that they didn't turn out chewy, the way regular wheat-based flour does. The under-baked cookies still ended up very crumbly, not at all gooey. But then, it's a small sacrifice, considering these were awesomely tasty. I suppose I might consider adding chocolate chips, or even white chocolate chunks, but I don't think it's all that necessary.

These are truly tender and tasty all by themselves.

I could have sworn I had two full dozen, not twenty minutes ago…

Oatmeal Cookies

Ingredients:

1 1/2 cups all-purpose flour
1 1 teaspoon double-acting baking powder
1/2 teaspoon baking soda
1 teaspoon salt
3/4 cup butter at room temperature
1/2 cup granulated sugar
1 1/2 cups firmly packed brown sugar
2 eggs, unbeaten
1 teaspoon vanilla extract
2 1/2 cups quick-cooking oatmeal
1 cup chopped pecans
1 1/2 cups dried cranberries
1 cup mini chocolate chips (optional)
1 cup white chocolate chips or chunks (optional)

Directions:

Set oven racks near middle of oven. Preheat oven to 375º F. Lightly grease at least 2 baking sheets.

In a small mixing bowl, sift together flour, baking powder, soda, and salt.

In larger mixing bowl, cream butter and then add sugars gradually, mixing to cream well.

Add eggs and vanilla, beat in well.

Completely mix in sifted dry ingredients, then add oatmeal, pecans, and, finally, dried cranberries (and, if you are adding them, now is the time for the chocolate chips. I passed, this time).

Drop dough by heaping teaspoonfuls onto a lightly greased cookie sheet (I use a 2-Tablespoon dough scoop), leaving about two inches between dough balls.

Bake 12 to 15 minutes, or until golden brown.

Remove from oven. If using gluten-free flour, allow to stand on baking sheet at least one minute to set up.  If using regular all-purpose flour, remove from baking sheet with thin spatula, finish cooling individually on rack. Be careful - they are tender and break apart easily!

See the one to the left of center? It cracked, and had to be eaten immediately…a pity, really.
Makes about 5 dozen small (2-bite) cookies, or about 3 dozen larger cookies.


Friday, April 17, 2015

Fluffy, Soft as a Cloud Soufflé Cheesecake (aka Japanese Cheesecake)

Topped with cherries in syrup. Like pie filling on a fluffy cheesecake.
For Pop's birthday, The Bat and I usually collaborate on a lemon meringue pie. For the birthdays of the young'uns, I go all out and build the cakes aimed to surprise them all.  For my birthday, I get to make my own dessert, too. I know, I know, this is all a surprise to my loyal readers (all two of you). It's a sort of rule in our house that, if you have any kitchen skills at all, and you want a cake on any birthday past your twelfth, you either go hit the local bakeries for a stock ice cream cake, or you can get fancy and make your own.

I can't eat the storebought ones. I like them, but they don't like me.

So I get to go crazy in the kitchen, and make my own.

The upside to this is that I can have whatever kind of dessert my little heart desires, and I can make it with no wheat, no other allergens, and few worries about, well…whatever.

The downside is, I have to choose between fluffy sponge cake, cheesecake, and pie. Or not.

Today, I decided to go into full, head-on hybrid mode. I made a cheese sponge cake (or, as it's known in more edumacated circles, a soufflé cake or a Japanese cheesecake), and top it with a nice pie-filling-like fruit (The Bat has some strawberries, and I have dark tart cherries). This puppy has the texture of a light and airy sponge cake, the tang of a cheesecake, and…fruit.

And I made a sour cream whipped cream topping to add to the decadence, for those people who think a birthday cake needs some kind of frosting.

But there are no candles on my cake. I don't want to burn the house down.


Soufflé Cheesecake, or Cheese Sponge Cake

Ingredients:

1/2 cup + 2 Tablespoons ultrafine sugar
5 large (not jumbo!) eggs, separated
1/4 teaspoon cream of tartar (I substitute 1/2 tsp rice vinegar for my own, due to an allergy)
3 Tablespoons + 1 teaspoon unsalted butter
8 oz cream cheese
1/3 cup whole milk
1 Tablespoon fresh lemon juice
1/3 cup plus 2 Tablespoons Gluten-Free All-Purpose flour or GF cake flour
2 Tablespoons tapioca flour
2 Tablespoons corn starch
1/8 teaspoon salt

Directions:

Preheat oven to 325º F, with rack in center of oven.

Lightly grease bottom & sides of an 8"x2" round cake pan. Line bottom of pan with non-stick parchment. Fill a larger pan with water to about 1 centimeter, set aside.

In microwave or double-boiler, melt butter, cream cheese, and milk. Allow to cool to room temperature. Add in flours, corn starch, salt, egg yolks, and lemon juice. Mix well.

In a large bowl, beat egg whites with cream of tartar (or vinegar) until frothy. Add in sugar and whip until soft peaks form (everybody meringue!).

Add 1/3 of egg whites to cheese batter mixture, fold in completely. Add batter to meringue, fold in gently and carefully until the marbling is no longer obvious.

Scoop the mixture into the cake pan and smooth the top.

Place water pan in oven, then set cake into the water bath.

Bake cake 70 minutes, or until golden brown and set. Turn off oven. Do not open oven for at least 20 minutes. It will rise to better than double in size, but then settles back down and pull away from the sides of the pan.

Allow cake to slowly cool in oven, in water bath.

When completely cool, remove from pan by sliding a thin knife around the edges of the pan anywhere it may still be attached, to loosen the cake.

If you want to show the golden side up, turn cake out onto a plate by setting a plate over the cake in the pan and then taking a second plate, making a plate-cake-sandwich to then flip it.


It resettles once it cools down. While baking, it's a gigantic crown of gold.
 If, however, you'd like it to look less like a cakey-cake and more like a cheesecake, turn it out onto a plate and allow the golden-brown top of the cake to become the bottom crust of the cheesecake.

I like the way the parchment expanded and made these nifty striations on the base.
Refrigerate at least 3 hours before serving.

Decorate with a simple sprinkle of powdered sugar on the browned top crust (you can create a waxed paper stencil for it, or sprinkle through lace, if you want), and/or offer your favorite fruit or syrup (fruity or chocolate) as a topping, with some sour-cream-based whipped cream* (scroll all the way down).

One can not live on cake alone.


*I will recommend, though, that you let people know, in advance of their piling on the whipped cream, if you use sour cream in the mix. Otherwise, they may believe your cream has turned, and not that it's a more daring, tangy combination of flavors.